What does Sunbonnet Sue need in the sweltering heat and blazing sunshine of Tokyo? A sunbonnet, of course! Here is a stylish straw hat.


What does Sunbonnet Sue need in the sweltering heat and blazing sunshine of Tokyo? A sunbonnet, of course! Here is a stylish straw hat.
We have just learned another chunk of five stitches, which means it is time for a review and a Sunbonnet Sue sampler.
The stitches are:

Easy and fast, this is a good basic stitch to add detached stitches or beads to.

Although it is a canvas stitch, it also looks good in free-form embroidery.

Vary it in scale and you get a different look.

Arch Stitch could be an alternative name! It's easy but I highly recommend using a fixative for the back to keep the loops in place.

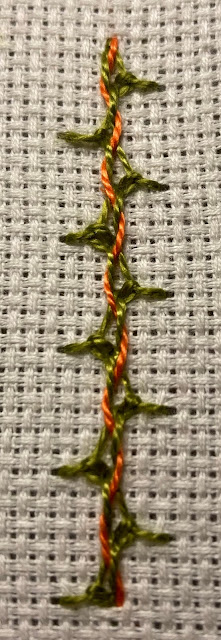
Here we have fun dressing up alternating Mountmellick Stitch with a lacing thread.
Homework:
Sunbonnet Sue needed something. Can you guess what it was?

This is an easy and enjoyable stitch!
Sorry for the poor photo quality.
Aida Sampler


Today's lesson falls on World Embroidery Day! So why not join me and the rest of the embroidery community and stitch something?
I have the perfect stitch for you, especially if you remember stitch number 254? Alternating Mountmellick Stitch?
In that blog post, I mentioned that Mary Corbet of Needle 'n Thread in her series of Stitch Fun had tweaked the Mountmellick Stitch into a laced version.
Today we are lacing the Alternating Mountmellick Stitch that way.
Go to Needle 'n Thread for a really clear tutorial.
Or make do with my photo instructions:
Start by making a line of Alternating Mountmellick Stitch.


under the first Chain Stitch's left side.

under the second Chain Stitch's right side.
Make sure you don't bite any of the fabric.


like metallic,


These samplers scream for Lacing!

