Sunday 30 July 2023

Sunday Stitch School - Lesson 260: Laced Mountmellick Stitch

Today's lesson falls on World Embroidery Day! So why not join me and the rest of the embroidery community and stitch something?

I have the perfect stitch for you, especially if you remember stitch number 254? Alternating Mountmellick Stitch?  

In that blog post, I mentioned that Mary Corbet of Needle 'n Thread in her series of Stitch Fun had tweaked the Mountmellick Stitch into a laced version. 

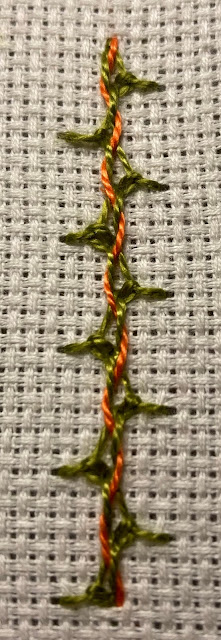
Today we are lacing the Alternating Mountmellick Stitch that way.

Go to Needle 'n Thread for a really clear tutorial.

Or make do with my photo instructions:

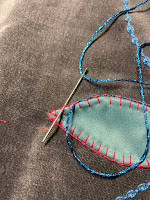
Start by making a line of Alternating Mountmellick Stitch.


When you have completed the line, and anchored
the last stitch, start the lacing.


Come out from the top of the stitching.


Take the needle from right to left

under the first Chain Stitch's left side.


Then from left to right

under the second Chain Stitch's right side.

Make sure you don't bite any of the fabric.


Anchor at the bottom.


Isn't it neat?


Try other types of thread,

like metallic,


or tapestry wool,


or ribbon,


or woven flat cord...


Please NOTE the stitch direction.
Follow the instruction above and the
characteristic 'triangles' of the 
Mountmellick can be seen.

In the next version, where I have used the opposite
stitch direction, the 'triangles' are buried 
under the lacing thread. You can't really 
see that the base stitch is Mountmellick.


Homework:

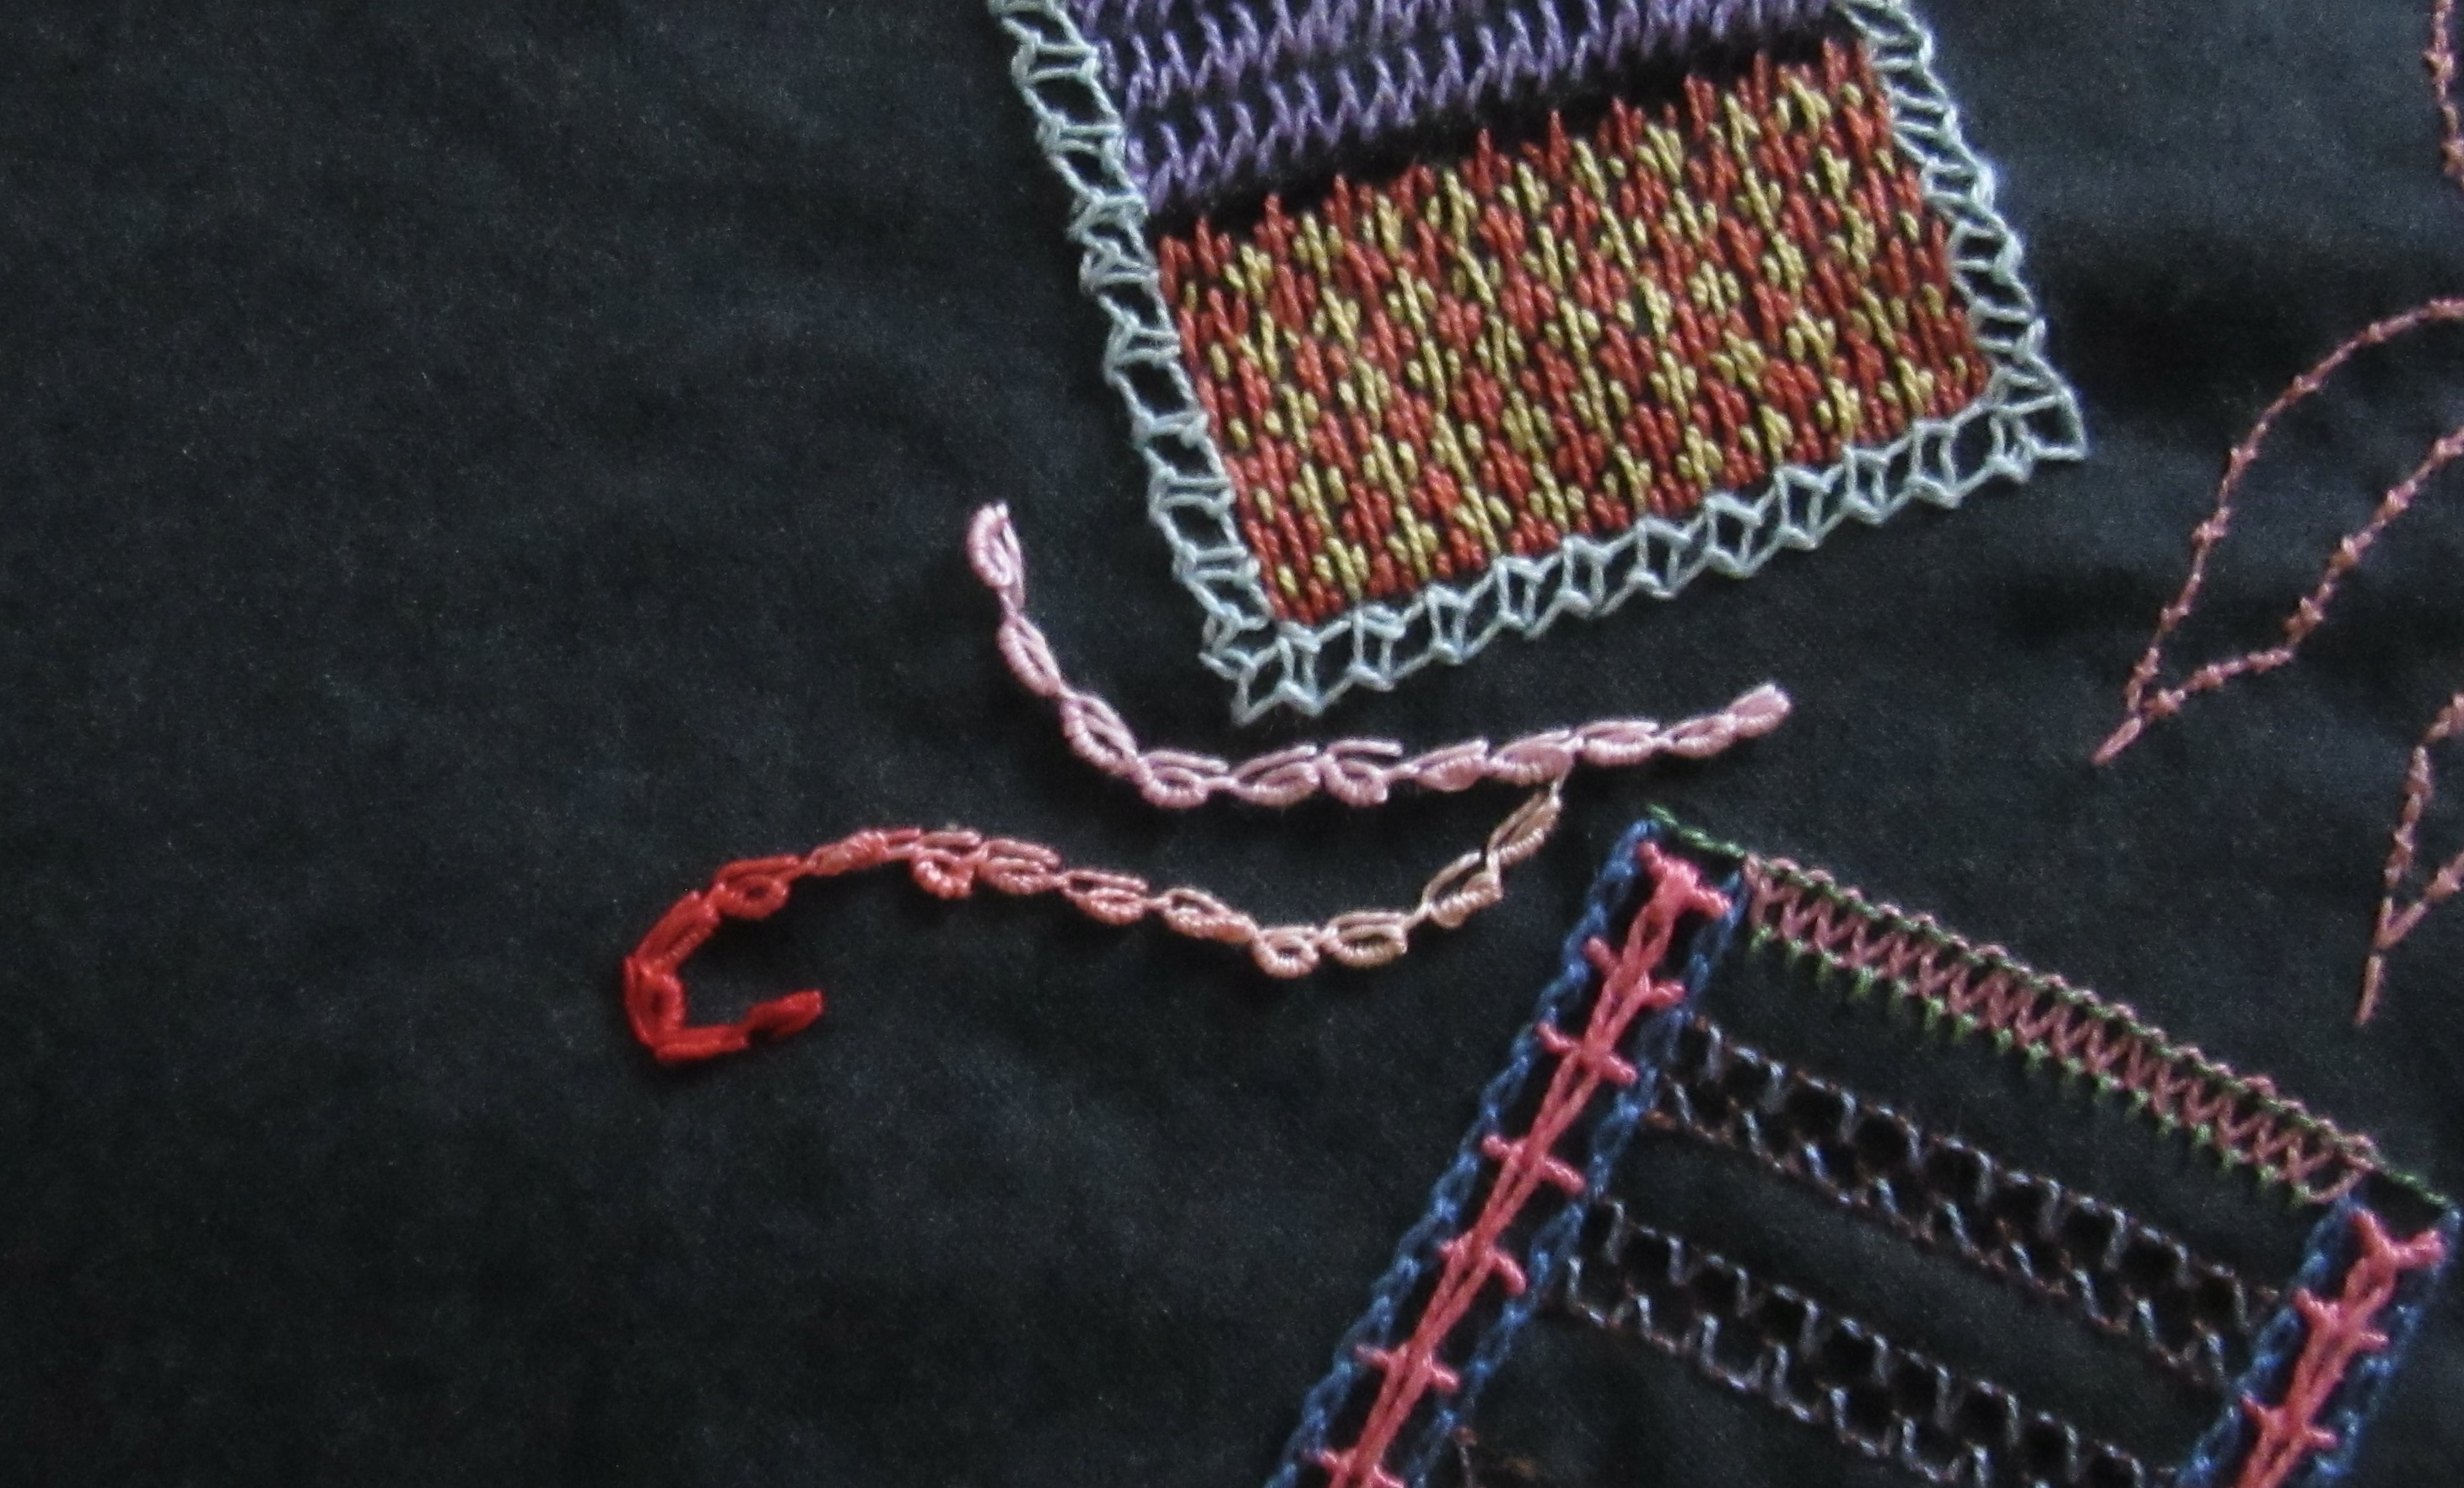
These samplers scream for Lacing!


Friday 28 July 2023

Friday Homework for Lesson 259: Raised Seeding Stitch

Aida is the type of fabric that causes some problems as it has these big holes. With some sticky stuff like glue or nail varnish on the back, it is easy to keep the carefully stitched arches in place. Without them, they easily snag and become either too tight or too loose.

Aida Sampler


Sunday Stitch School Reference Chart

Look at the shadows!


Mottled Wool Scribble Cloth

Here I wanted to try a new idea. I used a length of plastic-covered electric cord, and folded it to double  width. After fixing it securely to the wool, I let the cord curve and meander over the surface. Finally,  I stitched it down with a variegated multicoloured thread.


With this method I thought I would get stitches that look as if they had been put there at random.


Keeping the plastic cord in place, I turned the work upside down and applied watery 'bond'.


Once it had dried I removed the cord with a pair of tweezers - it was the hardest part of the job.


The Raised Seedling Stitches now sit securely and seem scattered at random - just the look I wanted.


Wednesday 26 July 2023

WIPW - Ready To Take Off

 It is time for a Work In Progress Wednesday report.


Mandala

I have added the plastic cups (covered with red transparent fabric) to the 'flying objects', which look ready to take off.


I will have to put on my thinking cap and decide what to do next.


Sunday Stitch School Stitch Sampler

The four rectangles were completed with Canvas stitches, and I wanted to play around with some linear stitches.

#152 Chain of Hearts in green and light purple.

#145 Roll Chain Stitch in pink and variegated pink/red.


Tuesday 25 July 2023

World Embroidery Day, Sunday 30th July, 2023

Don't forget to pick up your needle and thread on Sunday, 30th of July. Stitch something. At home, at your Guild or in the park, with friends or alone. Start something new or make progress on a UFO. Celebrate the joy, beauty and power of embroidery. Have a wonderful day.

 It is World Embroidery Day.


Sunday 23 July 2023

Sunday Stitch School - Lesson 259: Raised Seeding Stitch

Today let's do a detached stitch that has a nice structure. As the name suggest,  it is a member of the Seed Stitch  family and it rises above the surface like an arch.

It can be found at Sarah's Hand Embroidery Tutorials


See my photo tutorial here:

Chose tightly woven even-weave fabric which you stretch tight in a hoop.

Stitch each individual stitch Back Stitch fashion

while leaving an arch. Spread them out evenly over the surface.


Aren't they cute?


Now these arches will not stay put unless you are very careful not to pull them.

There is one way you can control them - with a fixative like the water-based Japanese 'bond'. Delute a dollop with a few drops of water.


Use a cotton swab to dot the watery paste onto the back of the stitches. 

Once it has dried you will not notice it,  the stitches, however, will stay put. 

Unless you plan to wash the embroidery, that is!! Then use a brushing of clear nail polish instead.

..................
There is another method where you tangle the stitches in place:

For this, I recommend using a bamboo skewer or fine crochet hook, six stands of DMC floss and a needle with a sharp tip.


Make a sturdy knot for the back.


Stitch over the skewer. Make two stitches at the same place.


Let the needle catch a bit of the thread.


Make another stitch a bit further away along the same skewer.

Take a stitch through the thread on the back to fix it.

Pull out the skewer carefully. The stitches ought to sit reasonably well.

Purple = perle cotton worked twice, red = 6 strands of floss, aqua = one stitch of perle cotton; the original stitch.


Homework: Build arches on these samplers.