Sunday 16 June 2024

Sunday Stitch School - Lesson 291: Kamal Kadai Basic Stitch

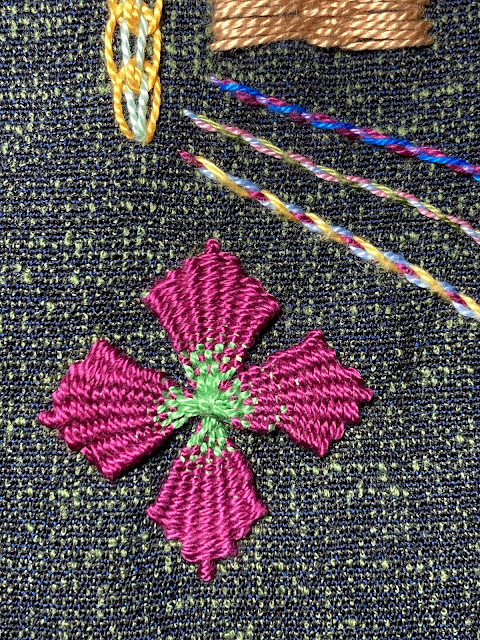
Here is a classic Indian embroidery style - Kamal Kadai. I have seen this version of the Woven Trellis Stitch many times on the internet and felt it was time to try it.

Today's instructions are based on Sarah's Hand Embroidery Tutorials, where you can see her excellent step-by-step instructions here.

Here is my photo guide:

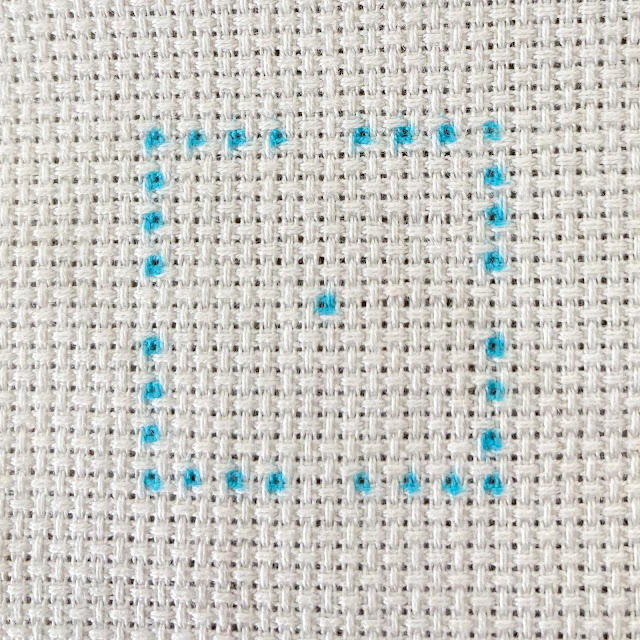
Mark four corners with an odd number of stitch points each. I chose seven.


Start by stitching two opposite corners in the Rhodes Stitch style.


Work the other two corner in the same way.


Tie the threads together with a Cross Stitch in the centre.


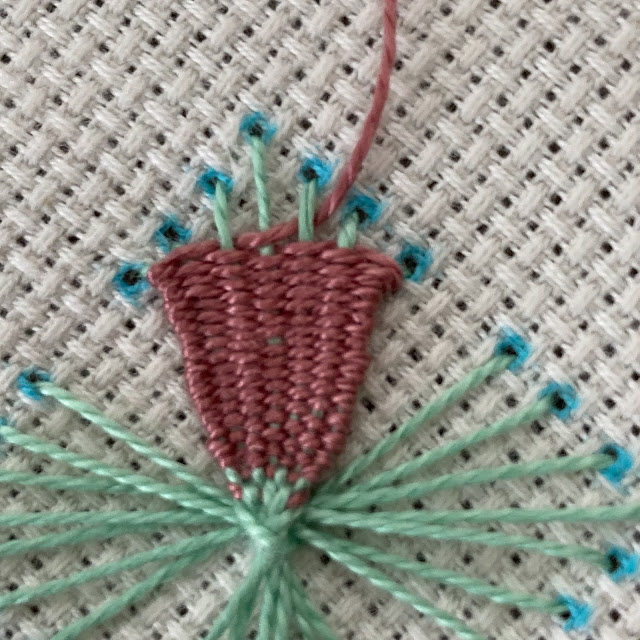
Now start weaving


At this point skip the two outer warp threads, i.e. weave over five threads.


When only the absolute corner thread remains, wrap it a couple of times until it is covered. Anchor.


Here is an example with different threads. Pink Perle 8, Variegated Perle 8, yellow Perle 5 and orange thick tapestry wool.

Homework: Add to the samplers


Friday 14 June 2024

Revision Homework for Stitches 286 - 290

When I first saw a stitch with the name Fairy Lights, I knew that Sunbonnet Sue would want to become a fairy, for a day at least. 

So here she is lighting the magic light bulbs and stretching garlands across the garden.


Other stitches used: Stem Stitch for outlines, Seed Stitch and Colonial Knots for accents.
The Armenian Edging is stitched over a ribbon that is attached at the top to the base fabric.

Wednesday 12 June 2024

WIPW - Cultivating Hexablooms

 Work In Progress Wednesday.

The Green Man

I have added more Colonial Knots to his face!


Hexablooms

This is how I cultivate my hexablooms:

I use scraps of cardboard cut into hexagons. 

I punch a hole in each one (this is a great trick I learned from Linda of Lins Arty Blobs, the hole makes it easy to remove the cardboard when it is no longer needed).

I use small Clover clips instead of pins to hold the fabric stretched in place over the card. 

I fold the left side over the right side at each corner.


Without making a knot I make three Back Stitches at a corner, then move anti-clockwise to the next fold and make two Back Stitches. At the last fold, I make another three BS.

I take one hexagon with metallic fabric for the middle of the flower and one (pink) cotton for the first petal.

I join them right sides together with clips and whip-stitch them together. I use no knot but take three stitches at the start and three at the end of the line.

Joined together they look like this.

Without cutting the thread I continue to stitch on the second petal.

Then time for the third petal.

All six petals are attached to the metallic in the middle.

Using a crochet hook, I remove the paper card by lifting it out from the metallic hexagon.

With the card in the middle out of the way, I can fold the flower over and whip-stitch the pink petals to each other.


That is how I cultivate my Hexablooms.


Sunday 9 June 2024

Sunday Stitch school - Revision: Stitches 286 - 290

It is time to work the last five stitches again and add them up on a Sunbonnet Sue sampler.

Click on the title to see the instructions.


286 Reversed Chain Stitch

This way of making the Chain Stitch might take a bit more time compared to the traditional  'in-the-hand' stitching and of course, the fabric needs to be stretched in a frame or hoop, but the stitches become even and neat.


287 Reversed Chain Stitch with Buttonhole Edging

Building on the previous stitch, just add laced loops on both sides of the chain and you get this beautiful braid-like stitch.


288 Fairy Lights Stitch

This is a magical stitch perfect for a scene of garlands of lights at a garden party. With metallic thread, you get a good glow.


289 Armenian Edging Stitch

Want some lace on the edge of a handkerchief? You don't have a crochet hook or a bobbin pillow with pins and bobbins? Fear not, you can embroider the lace!


290 Threaded Herringbone Stitch

I have found that there are two ways that the basic Herringbone Stitch can be embellished and called Threaded Herringbone Stitch. Here is the more unusual way. 

The other, which is more often seen, has also got another name and I will eventually add it to the Sunday Stitch School collection, then under its alternative name. That's for another lesson, though.


Homework:

Think up a good way to let Sunbonnet Sue get entangled with all these five stitches.


Friday 7 June 2024

Friday Homework for Lesson 290: Threaded Herringbone Stitch

This Threaded Herringbone Stitch is not the only stitch with this name! 

In Mary Thomas's Dictionary of Embroidery Stitches, there is also a Threaded Herringbone Stitch, but where the contrasting thread is laced over and under the foundation stitches in a wavy line. 

When I took part in TAST (Take A Stitch Tuesday)  I learned #51 Raised Herringbone Band and #121 Twisted Lattice Band. It is that kind of threading used in Mary Thomas's version.


Apparently, Mary Thomas's Threaded Herringbone Stitch is also known as Barred Witch Stitch. One day in the future I will introduce this version here at Sunday Stitch School as it is an attractive, easy and useful stitch.

Now for today's homework:

Aida Sampler


Sunday Stitch School Reference Chart


Mottled Wool Scribble Cloth


Wednesday 5 June 2024

WIPW - Hexed by Hexablooms

Work In Progress Wednesday report.


Sunday Stitch School Stitch Sampler

I added a circle of felt whose edges I stitched with  #289 Armenian Edging Stitch. 

Not wanting to waste any thread I stitched not only once around the circle but used up what was left in the needle. Doesn't it look like lace?


Once I add a detached stitch to my collection of Sunday Stitch School stitches, I will use that to fix the felt to the wool foundation. Until that time I will keep the basting thread in place.


The Green Man
I have added more Colonial Knots to the Green Man.


Hexablooms

Beware of Hexagons! I found out that you can be hexed by the Hexablooms! 

I know I said the hexagon quilt I started last week would be a slow project, yet I have spent quite a lot of time on it. 

I have cut some more cardboard hexes from empty boxes, and I have cut square pieces of fabric,  from both quilting cotton and fancy metallic (mainly gold or copper). The former will be used for the flower petals and the latter is destined for the centre part of the hexagon flowers. Unfortunately the metallic glitter does not photograph well!


Rescuing a Furoshiki
A Japanese furoshiki is a large piece of square fabric, similar to a large handkerchief. It is used to wrap things in. 

When I am not working on the Green Man quilt I wrap it up in a large nylon furoshiki. However, it is an old furoshiki and has begun fraying at the edges.

I seldom use my sewing machine, but for once it was set up on the table. So I decided I would take the opportunity to rescue the furoshiki by re-hemming the edges. 

With the machine came a presser foot for making a rolled hem. I have used it once but the result was disappointing. It was time to give it a new try. Lo and behold, I managed to stitch a beautiful even rolled hem!


It has been a good and productive week!


Sunday 2 June 2024

Sunday Stitch School - Lesson 290: Threaded Herringbone Stitch

 How many variations on the Herringbone Stitch have we learned? I, anyway, have 13 under my belt!

TAST = Take A Stitch Tuesday  the stitch tutorial and challenge by Sharon Boggon of Pintangle

#5 Herringbone

#120 Double Herringbone

#124 Closed Herringbone

#125 Beaded Herringbone

#143 Fancy Herringbone


Sunday Stitch School     the collection and tutorial of hand embroidery stitches here on this blog

#77 Tied Herringbone

#112 Raised Herringbone

#140 Indian Herringbone

#166 Satin Herringbone

#184 Herringbone Ladder 

#220 Backstitched Herringbone

#235 Barred Herringbone

#258 Half Herringbone

.........

and so today we will be learning #290 Threaded Herringbone Stitch which I found in Betty Barnden's The Embroidery Stitch Bible.

It is not a difficult stitch. 

Start off with a section of Herringbone Stitch.


Change to a different coloured thread. Come out just where the threads cross at the bottom of the line.


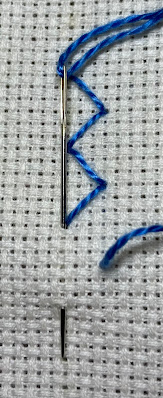
Go underneath the bottom right 'foot'.


Then do the same to the next 'foot'. Make sure you don't enter the fabric.


At the end of the line, anchor the thread.


Turn the embroidery around and repeat on the other side.


Voila!

Homework:

Add to these samplers: