Showing posts with label Blanket Stitch Honeycomb. Show all posts

Friday, 4 November 2022

Friday Revision Homework - Stitches: 226 -230

Sue exchanged her sunbonnet for a witch's hat, then went trick-or-treating:

'Put some sweets in my Jack-o'-Lantern, or I'll trick this spider into infesting your house forever!'


I have also used Stem Stitch for the outlines and Back Stitch for the spider.

Sunday, 30 October 2022

Sunday Stitch School - Revision: Stitches 226 - 230

Here we go again, it is time to make a summary of five stitches,  226 - 230.

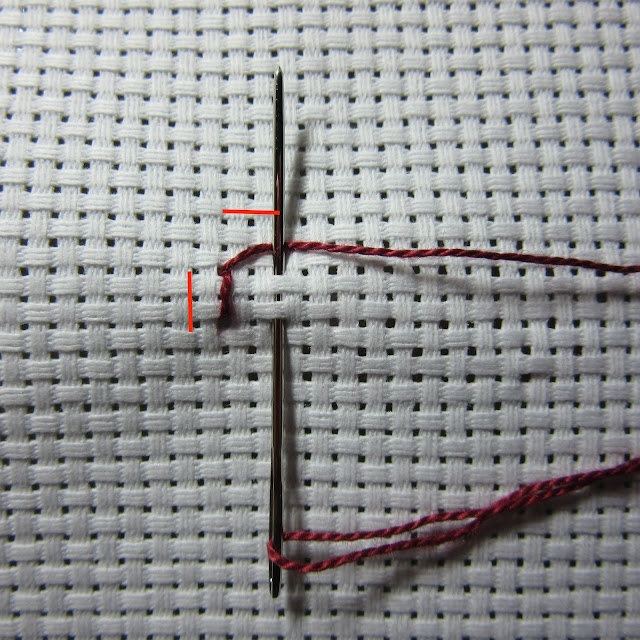
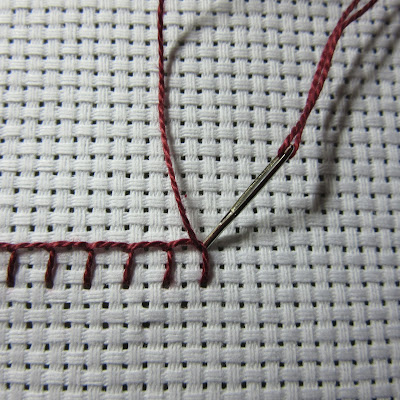
Click on the title for each stitch to get to the instructions.


226 Badass Star Stitch

This is a beautiful stitch, and with a bit of recalculation, you can save a lot of thread by only filling in the front of the fabric.


This takes time and you need to keep an eye on the edges, but the result is nice.


228 Zig-zag Palestrina Stitch

Oh, this looks so good, especially on Aida fabric and with short 'legs'.


229 Fancy Laced Running Stitch

Here is a braid for you. There are so many colour combinations you could make...


230 Cone Bullion Knot Stitch

Carrots or flower petals, these are fun bullions to make.


Homework:

Sunbonnet Sue will illustrate what you can do with these five stitches.


Friday, 7 October 2022

Friday Homework for Lesson 227: Blanket Stitch Honeycomb

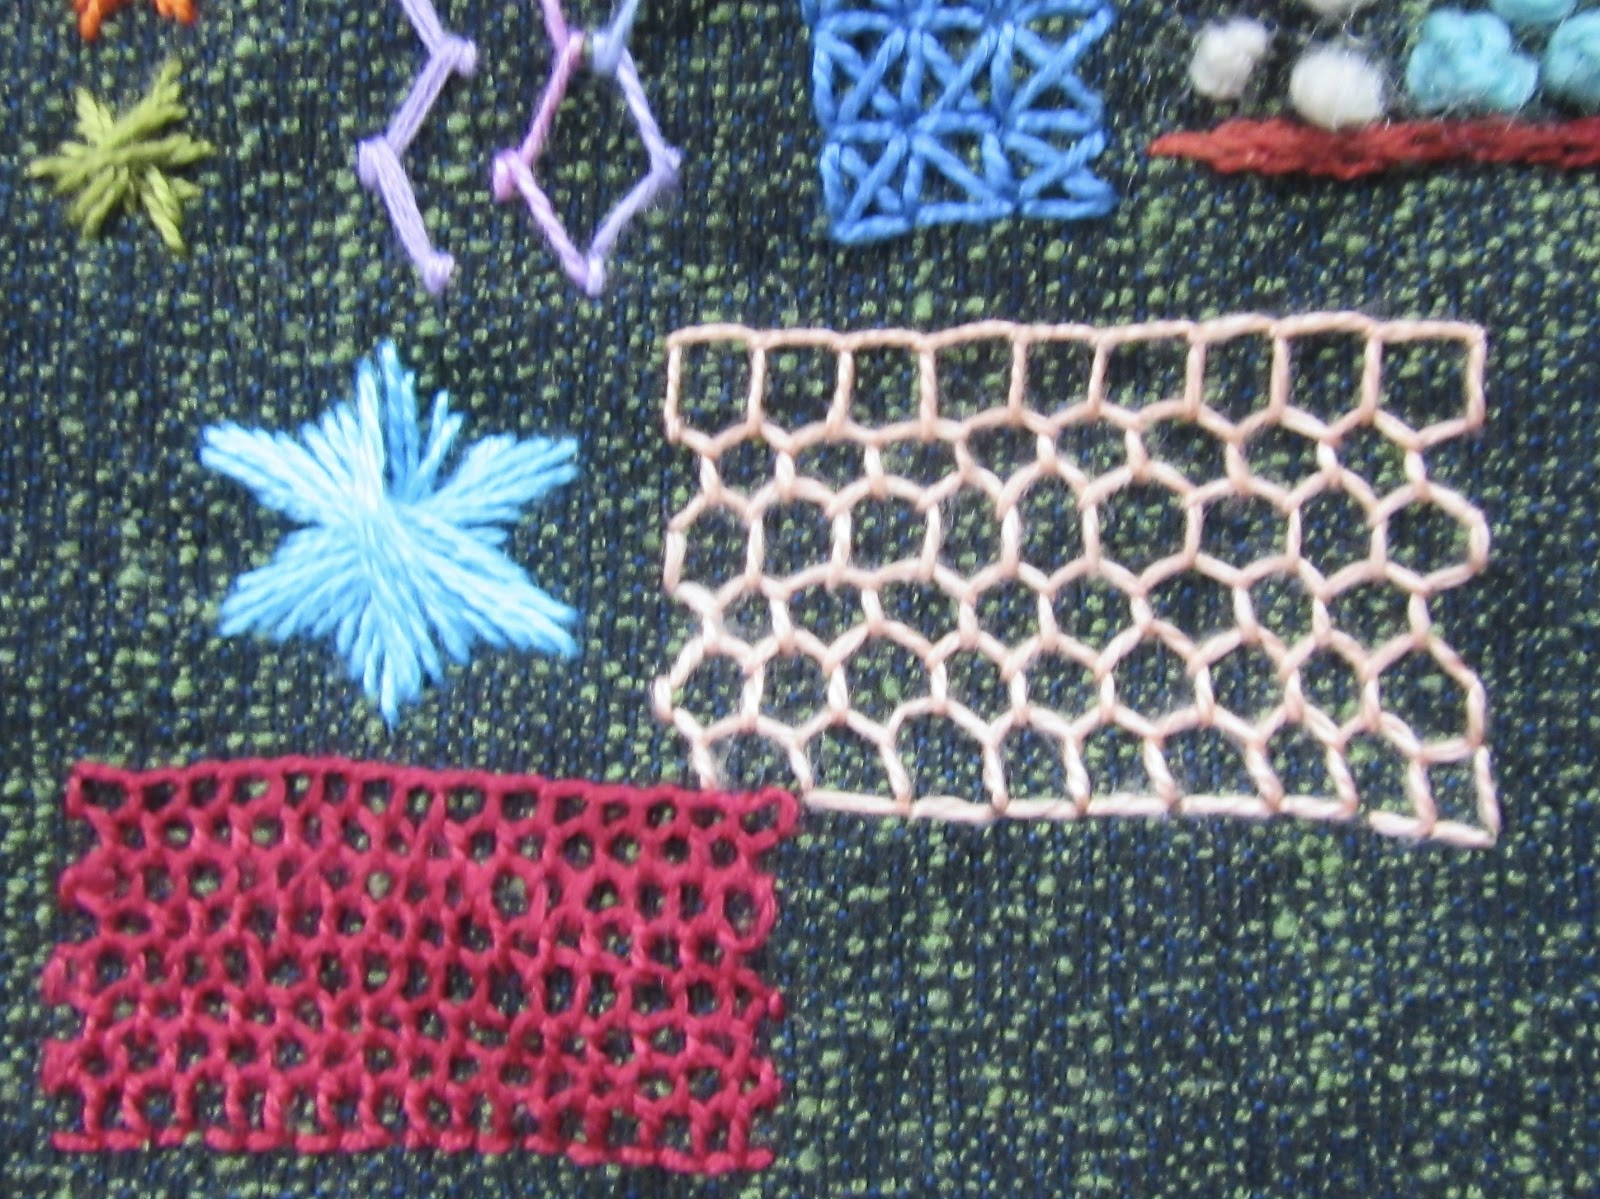
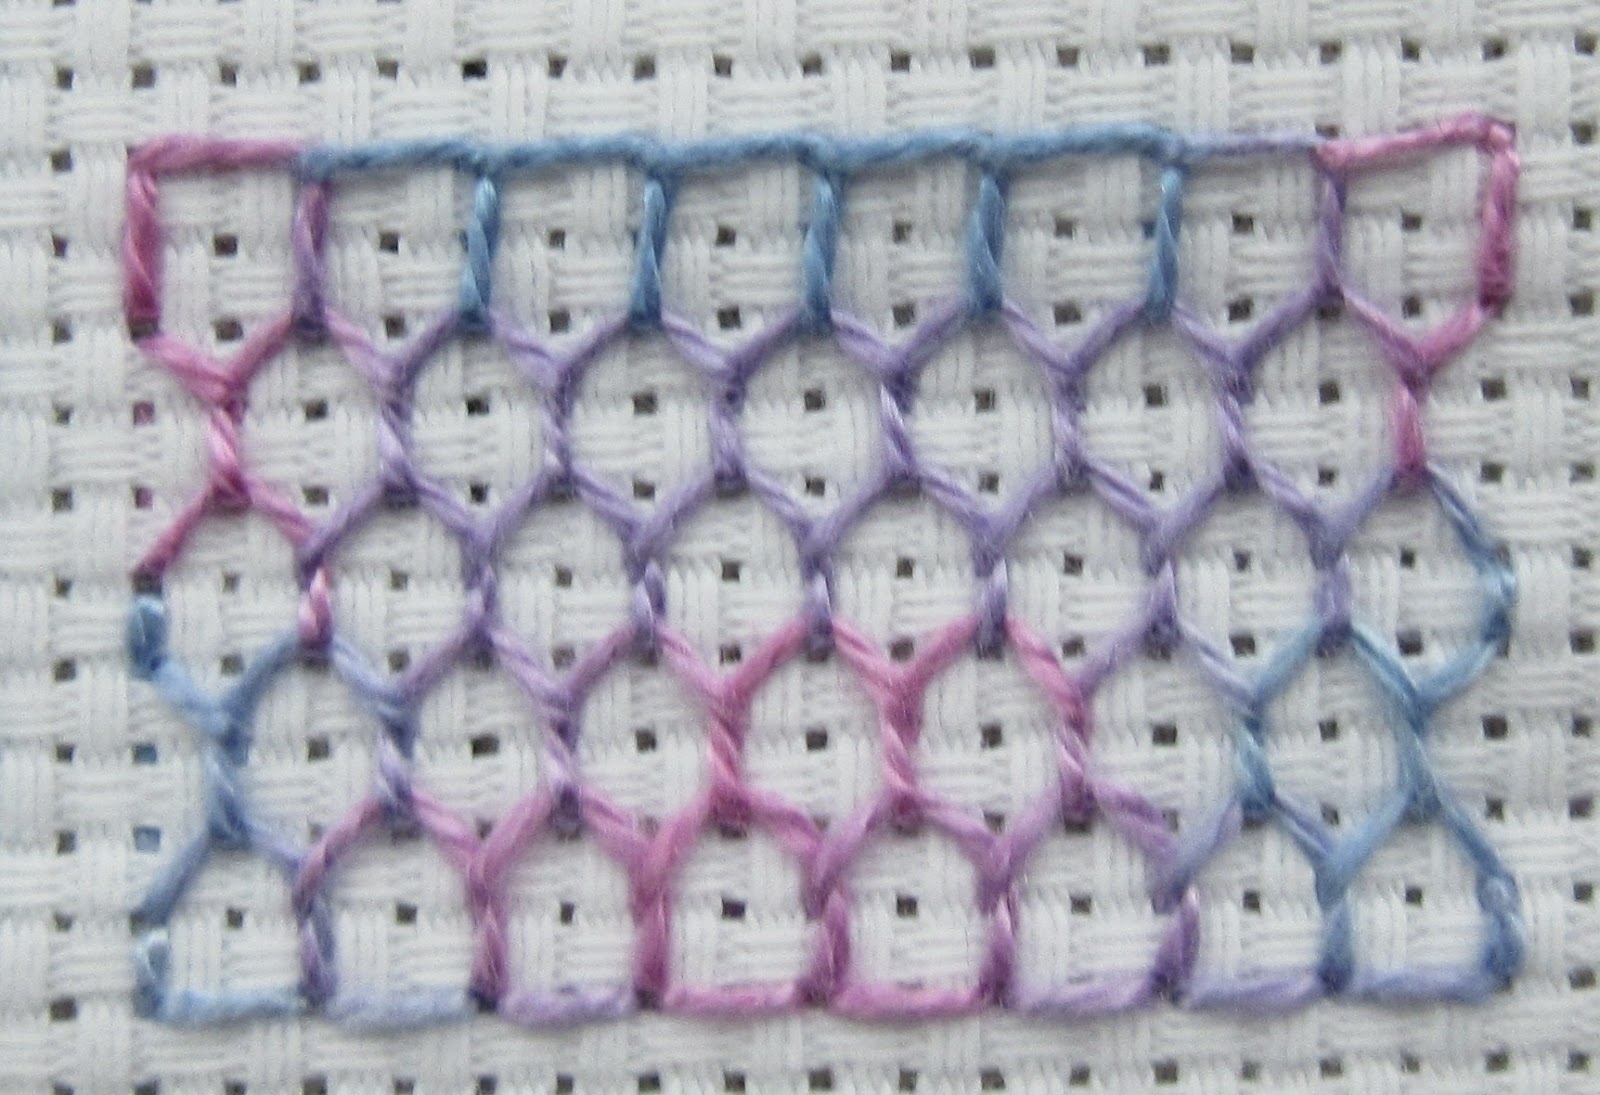
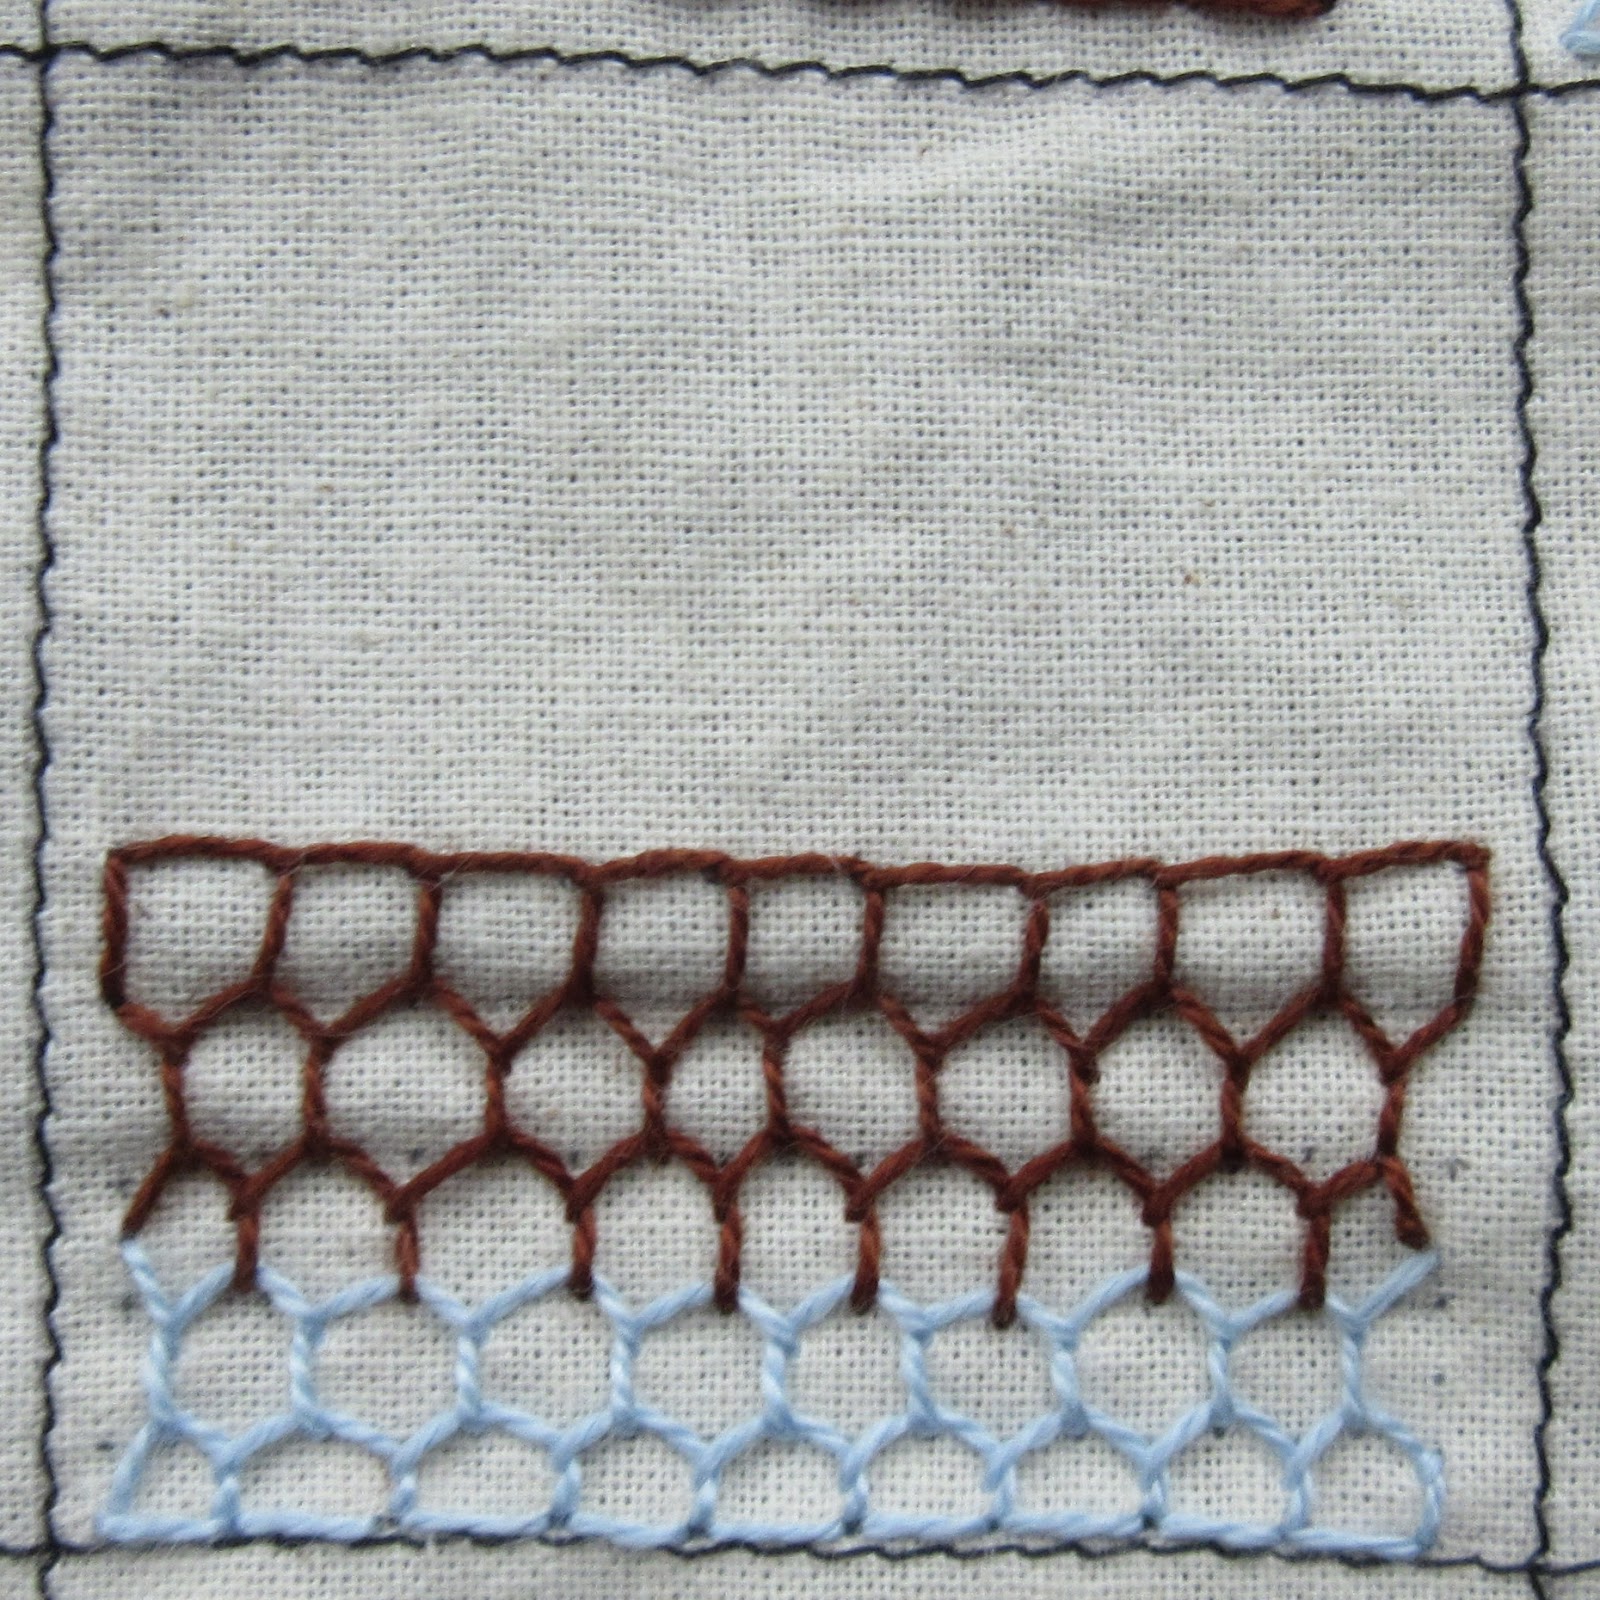
I have not got on well with the edges, nor with the size of the cells of these honeycombs, probably because I've been too tired to concentrate. This is a stitch that requires a certain amount of attention. At the moment I ought to have got in for auto-pilot stitches!

Anyway, here are:

Aida Sampler


Sunday Stitch School Reference Chart
 

Mottled Wool Sampler


I wonder if the bees have been intoxicated as they have built some very wobbly honeycombs.

Monday, 3 October 2022

Sunday Stitch School -Lesson 227: Blanket Stitch Honeycomb

Hello there. 
This week's stitch is a filling stitched called Blanket Stitch Honeycomb. I found it at Sarah's Hand Embroidery Stitch Tutorials where you can see a photo tutorial.

On YouTube, there is this neat video.

Both these tutorials show clearly how to stitch so I recommend that you have a look.
However, I wanted my edges to be a bit neater and have made some changes:

Start with an upright Back Stitch

I have worked over three holes in a square.

Anchor the last stitch, then come out at the bottom of the last 'leg'.

For the next row, notice the position and direction of the needle.

Don't bite the fabric.


At the end of the row, anchor at the bottom of the first 'leg'.


When you need no more rows, make a line of Back Stitch to get a fake Buttonhole look.


Are you confused? Have you fallen asleep after seeing all these pictures? With a bit of patience and care it is quite straight forward.

Homework: 
Add to the samplers.