Showing posts with label The Green Man. Show all posts

Wednesday, 26 June 2024

WIPW - The Green Man

 This is the weekly Work In Progress Wednesday report.


The Green Man

This stained glass block where I have decorated the bias tape between the various pieces of 'glass' is now complete.  Colonial Knots have been added to every void of the Herringbone Stitch.


Sunday Stitch School Reference Chart

Ever since I started Sunday Stitch School in November 2016,  I have made reference charts to showcase the stitches. The latest chart is now full and contains 30 stitches,  #262 - #291.

I removed the butterfly-printed support panels (they've been there to make it easier to stretch the chart in a hoop). 

Furthermore, I typed the names of every stitch, printed it on fabric and stitched each name in its right box by machine.  

The next step was to prepare a new chart and attach the butterfly panels to it. The new chart has space for 54 new stitches! I certainly hope I will be able to find 54 stitches!


 Hexablooms

I stitched up five more flowers. I used grey fabric for one of them - have you ever seen a grey flower before?


Wednesday, 19 June 2024

WIPW - A Few More Studs

Work In Progress Wednesday report.


Sunday Stitch School Stitch Sampler

I added #289 Threaded Herringbone.


The Green Man

got a few more studs. The remaining areas can be seen here.


Hexablooms

Five more hexagon flowers were stitched and a handful of cardboard hexagons were cut.


Wednesday, 12 June 2024

WIPW - Cultivating Hexablooms

 Work In Progress Wednesday.

The Green Man

I have added more Colonial Knots to his face!


Hexablooms

This is how I cultivate my hexablooms:

I use scraps of cardboard cut into hexagons. 

I punch a hole in each one (this is a great trick I learned from Linda of Lins Arty Blobs, the hole makes it easy to remove the cardboard when it is no longer needed).

I use small Clover clips instead of pins to hold the fabric stretched in place over the card. 

I fold the left side over the right side at each corner.


Without making a knot I make three Back Stitches at a corner, then move anti-clockwise to the next fold and make two Back Stitches. At the last fold, I make another three BS.

I take one hexagon with metallic fabric for the middle of the flower and one (pink) cotton for the first petal.

I join them right sides together with clips and whip-stitch them together. I use no knot but take three stitches at the start and three at the end of the line.

Joined together they look like this.

Without cutting the thread I continue to stitch on the second petal.

Then time for the third petal.

All six petals are attached to the metallic in the middle.

Using a crochet hook, I remove the paper card by lifting it out from the metallic hexagon.

With the card in the middle out of the way, I can fold the flower over and whip-stitch the pink petals to each other.


That is how I cultivate my Hexablooms.


Wednesday, 5 June 2024

WIPW - Hexed by Hexablooms

Work In Progress Wednesday report.


Sunday Stitch School Stitch Sampler

I added a circle of felt whose edges I stitched with  #289 Armenian Edging Stitch. 

Not wanting to waste any thread I stitched not only once around the circle but used up what was left in the needle. Doesn't it look like lace?


Once I add a detached stitch to my collection of Sunday Stitch School stitches, I will use that to fix the felt to the wool foundation. Until that time I will keep the basting thread in place.


The Green Man
I have added more Colonial Knots to the Green Man.


Hexablooms

Beware of Hexagons! I found out that you can be hexed by the Hexablooms! 

I know I said the hexagon quilt I started last week would be a slow project, yet I have spent quite a lot of time on it. 

I have cut some more cardboard hexes from empty boxes, and I have cut square pieces of fabric,  from both quilting cotton and fancy metallic (mainly gold or copper). The former will be used for the flower petals and the latter is destined for the centre part of the hexagon flowers. Unfortunately the metallic glitter does not photograph well!


Rescuing a Furoshiki
A Japanese furoshiki is a large piece of square fabric, similar to a large handkerchief. It is used to wrap things in. 

When I am not working on the Green Man quilt I wrap it up in a large nylon furoshiki. However, it is an old furoshiki and has begun fraying at the edges.

I seldom use my sewing machine, but for once it was set up on the table. So I decided I would take the opportunity to rescue the furoshiki by re-hemming the edges. 

With the machine came a presser foot for making a rolled hem. I have used it once but the result was disappointing. It was time to give it a new try. Lo and behold, I managed to stitch a beautiful even rolled hem!


It has been a good and productive week!


Wednesday, 29 May 2024

WIPW - A Book Cover

 Here is this week's Work In Progress Wednesday report. I am happy to say I managed a lot of work.


Rescuing the Sweater

I completed the restoration work on both sleeves and can now pack away the sweater together with some mothballs. In autumn it will be lovely to once more put it on. I hope to wear the sweater for many more years to come.


Book Cover

I made a simple birthday present - a notebook cover. This pattern is for a reversible cover - the lining can become the outside cover if you turn the cover inside out. 

I had a piece of blue and white gingham check (used for the lining), a remnant of kimono cotton (Yukata) for the pockets and a fat quarter with a charming print designed by Mutsuko Yawatagaki. 

Ms Yawatagaki is a famous quilter who usually works with kimono silks. She operates a charming quilt art museum in the countryside and I bought the fabric from the museum shop some years ago. I was happy to use the fabric for this book cover.


By the way, my friend Pamela of Hokkaido Kudasai, made a beautiful wall hanging with fabric from Ms Yawagataki's collection.


Sunday Stitch School Stitch Sampler

I added one more stitch, #288 Fairy Lights Stitch to my sampler of Sunday Stitch School stitches. 
Rachel of Virtuosew Adventures pointed out that metallic thread would be good for the Fairy Lights Stitch. She is so right! The lights glint and glow!


I threaded the needle with three colours and started with red metallic. After three 'lightbulbs', I switched to the blue thread, and so on. The non-visible threads are wrapped over the Running Stitch on the back of the fabric.


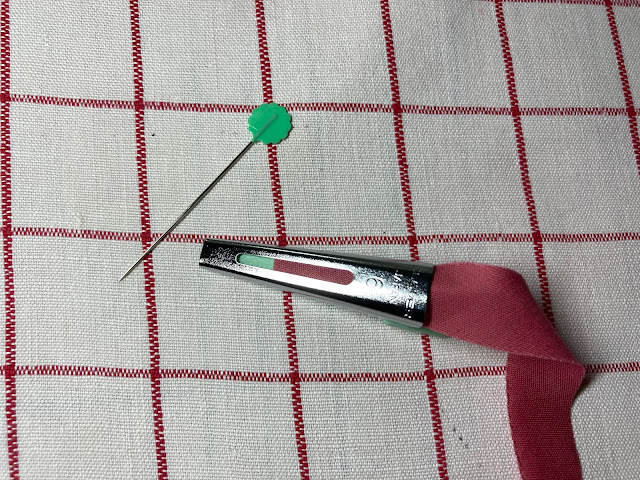
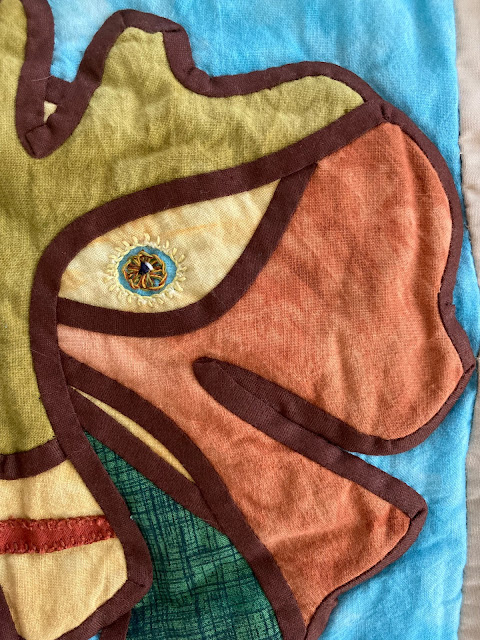
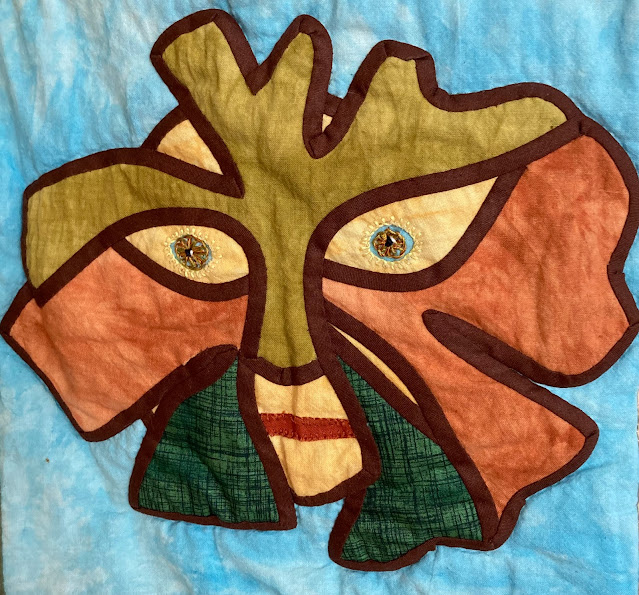
The Green Man - Final Work

Do you remember What's In A Quilt - The Green Man?


Click on the link to see the start of the embellishment of the bias tape.  

Life got in the way and I never completed the Herringbone stitches. Until now that is. I started on the embellishments again, finished the HB stitches and began adding French Knots.


A New Start - Hexablooms


So many bloggers work on Hexagon quilts. Whenever I see these English Paper Pieced quilts I feel an itch in my fingers - I want to make such a quilt, too! The problem is finding time for quilting...

Then I threw caution to the wind and decided to indulge in a SLOW project. 
I will collect any piece of scrap cardboard, e.g. food containers, that otherwise would end up in the recycle bin, and cut out hexagon shapes. 
I will then make use of the many small scraps of fabric I have in my stash to make flowers for my Hexablooms quilt.

It will be a SLOW project, without any time limit, I might be working on this new quilt, a large one, for 10 years or more! No pressure allowed!


Thursday, 7 December 2023

What's In a Quilt - The Green Man - Part 18: Embellishing

 I had high hopes for stitching a lot, but life got in the way. Why is December always so busy?

I only had time to stitch two strands of thread!


Thursday, 30 November 2023

What's In A Quilt - The Green Man - Part 17: Mending

 Do you remember the tear in the Stained Glass block? Well, I just had to mend it.


That was easy and quick.

So easy and quick that I could go on and add a bit more delight to the Green Man. After all, I still had the needle and thread by the ready. Why not embellish the bias tape with embroidery? I've done it before on another quilt:


I started with a simple Herringbone Stitch.


To be continued ...


Thursday, 23 November 2023

What's In a Quilt - The Green Man - Part 16: Quilting

Finally, we have come to the quilting of the Green Man. There is very little quilting in many of the blocks themselves but the border has a meandering leafy pattern à la William Morris. 

Before I started the quilting I drew in the stem and leaves, then I used a thin brush and a diluted bleach solution to follow the drawn line. I then quilted using a short Running Stitch. 

Taking out the quilt from the closet to write the story of the Green Man and to document the various techniques I have used, I wanted to show off the quilting line more. 

As I can never say no to embroidery I decided to use the Running Stitch as a base and make the stitches more prominent. What better to do than whipping them?


To be continued ...

Thursday, 16 November 2023

What's In a Quilt - The Green Man - Part 15: Stained Glass Quilt


It is time for the 15th and last block of the Green Man Quilt. Here I have used the Stained Glass technique with bias tape.

First, you need to make the bias tape. Cut a length of fabric, like a ribbon, on the diagonal.

In the picture, you can also see a bias tape maker. With the help of a pin, insert the end of the tape into the wider end of the tape maker.

Use the pin to pull the tape out through the narrow end.


Turn the tape maker upside down and you can see how the bias tape has been folded.


Now fix the end to the ironing board with a pin and


use your iron to press the folded tape flat.


The next step is to cut the pieces to be appliquéd and place them next to each other.


Place the bias tape over the two raw edges and stitch down.
Voila! You have the beginning of a stained glass window!

There are plenty of bias tapes for quilting, sold by the roll,  if you don't want the trouble of making your own tapes.


Here is the Green Man.

His eyes are reverse appliqué with embroidery. The mouth is Buttonhole Appliqué.

Unfortunately, some areas are worn and the raw edges are coming out. I will do some repairs and show you at a later stage.


To be continued...