Wednesday 31 October 2018

WIPW - Button and Buttonhole Bars, and plenty of Lead

Work In Progress Wednesday is here again.

For this Wednesday I have just a bit progress to report on

Crazy for Crazy

I attached a button with Buttonhole Bars.


I spent considerably more time on the 

Cathedral Windows

The twenty blocks are now stitched together, all by hand, that it why it took such time. Heavy work, well it is 'lead' after all, ha, ha!
This will be the foundation for the front of the bag/cushion I am making.

I have picked out marbled batik for the 'stained glass' inserts. Cutting will start tonight.
More WIP next week Wednesday.


Sunday 28 October 2018

Sunday Stitch School - Lesson 78: Interlaced Chain Stitch

We have got an invitation to another wedding this week. It is between Mr Inter Laced and Ms Chain Stitch.

Yes, this week's stitch is made up of two threads, or even three!

Mattia tells me the French name is: Point De Chainette Interlacé

First you make a line of Chain Stitch.

Then change to another thread and come out at the top.
Go under the second link in the Chain Stitch, without biting the fabric.
The needle goes from outside, into the stitch (right to left).


Now turn the needle and go from left to right in the first link.


Repeat


At the end of the line, anchor the stitch


and come out very close by.
Now work in the same way from down to up.


Anchor at the top.

You can fix the outer loops with a stab stitch - the newlyweds will pledge to stay together forever.

Or use a different thread - now who is the third person who would keep the couple together? The child?


Mary Corbet of Needle 'n Thread has a tutorial with very clear photographs. Her neat stitching is a delight to see, check out the even tension.


Homework:
Add stitches to these three pieces.

Friday 26 October 2018

Friday Homework for Lesson 77: Tied Herringbone Stitch

This homework was done in a jiffy. So easy and fun!

Sunday Stitch School Reference Chart


 Aida Sampler


Teal Wool Tailoring Scribble Cloth

What did I learn? 
That a thinner and lighter coloured thread should be used for the Coral Stitch part on top of the Herringbone base.

Wednesday 24 October 2018

WIPW - Cathedral Window's Lead Squares Completed

Work In Progress Wednesday comes around so quickly! What have I got to show?

Well,
Crazy for Crazy
I have added the following embroidery:


Cathedral Window
To make one side of the bag I am planning I need 20 black squares of 'lead'. These are now completed

The next step is to join them together like this, all twenty of them, 4 rows, 5 columns.

I hope you have had a much more productive week.

Sunday 21 October 2018

Sunday Stitch School - Lesson 77: Tied Herringbone Stitch

Today let'g go to the wedding of Mr Herring Bone-Stitch and Ms Coral Stitch. After they have tied the knot, they become, Tied Herringbone Stitch, which will be No 77 in the Sunday Stitch School's stitch collection.

Follow the 'ceremony':


Homework:
Aida Sampler
Sunday Stitch School Reference Chart
Teal Tailoring Wool Scribble Cloth

Saturday 20 October 2018

Generous Gifts

I am very fortunate to have been given two beautiful gifts. Both of them are bags.

The first is a small bag with hand embroidery. Isn't it charming?
 Front


 Back
(I am so glad the birds have escaped their tiny cage!)


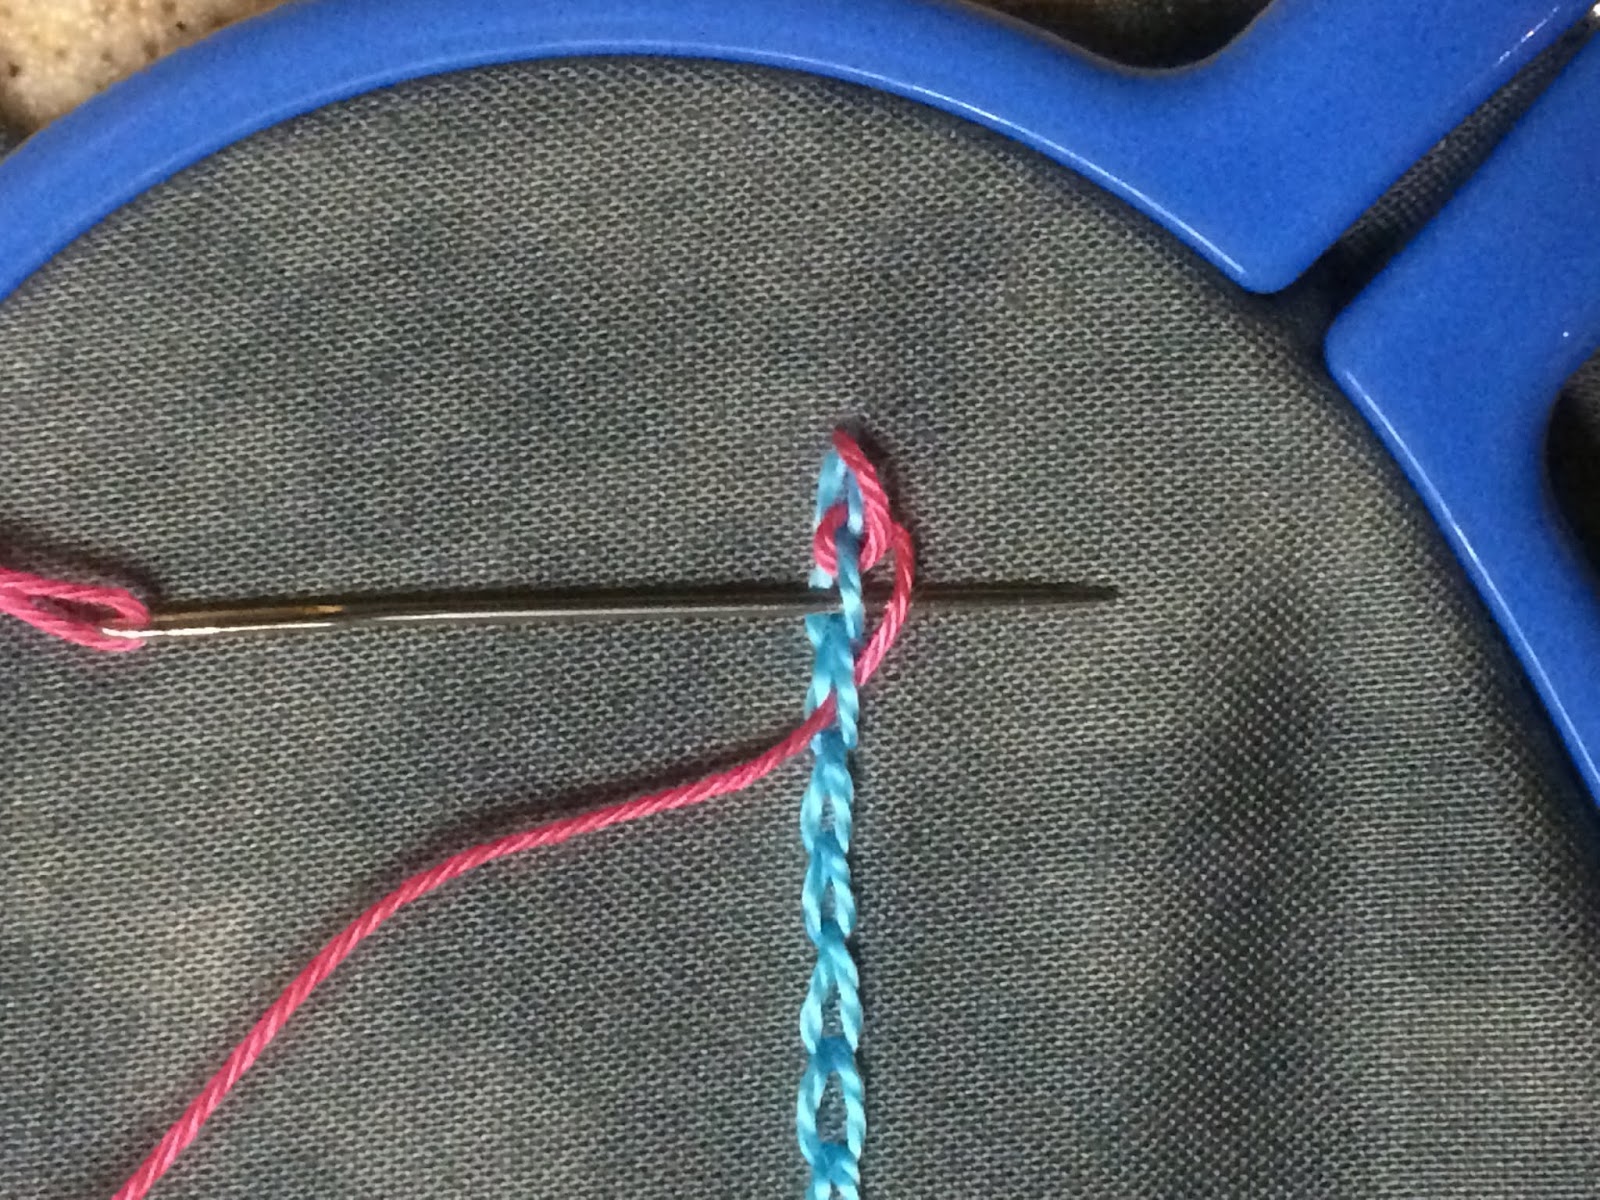
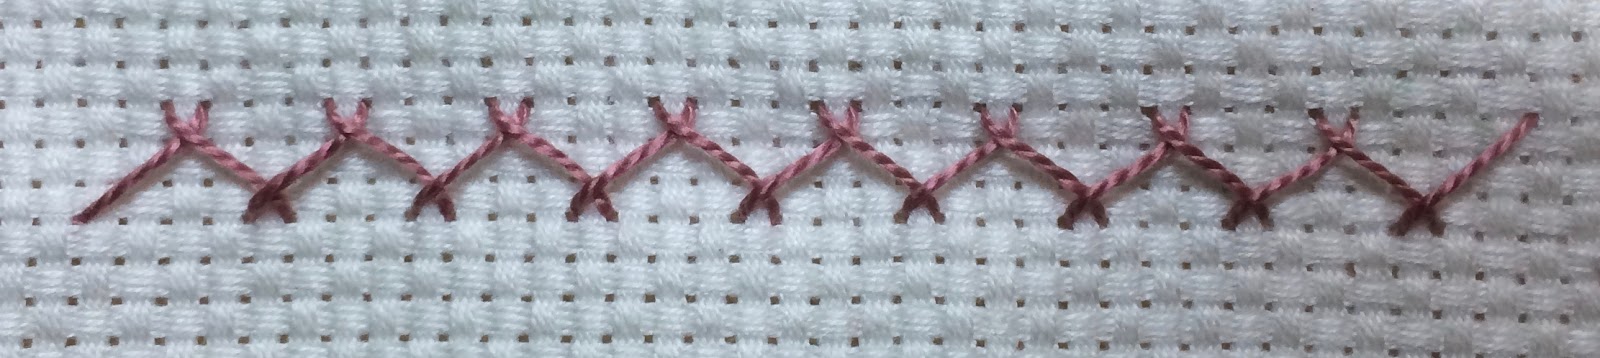
 Detail of the fine embroidery


The other bag is a simple shopping tote.
White cotton fabric has been dyed with onion skins into a warm mustard colour.
The print is hand stamped - probably with a hand carved stamp of either rubber or potato.
Together with a diploma it was given to one of my family members as a reward from the Town Council. Why?
His dentist had reported to them that, at the age of 80, he still had 31 of his own teeth - no caps, bridges or implants.
The bag came with a list of other citizens over the age of 80 who had most of their teeth in tact. One of them was 95 and had all 32 teeth. I wonder what she was given as a reward?!

This list was surprisingly short, and to me this proves that the Japanese on average have bad teeth, or have let the dentist alter their teeth for various reasons.
I know one girl who was encouraged to remove two absolutely healthy, but slightly crooked, front teeth for porcelain implants, before her wedding. 'You want to have a beautiful smile on your wedding day, don't you? was the sales point.
Poor girl, she won't be given a nice onion-skinned dyed tote bag when she is 80!

Now I am left with a dilemma. If I carry this bag around in our neighborhood people will think I have good teeth, which is nice, and true!, but will they also think I am over 80?
I am 'young' enough to wear out this bag before I turn 80, so I hope I will be given one of my own when I reach the right age!

Friday 19 October 2018

Friday Homework for Lesson 76: Loopy Flower Stitch

Here we are, Friday night and time for homework.

The Loopy Flower Stitch was easy and fun to make.

Aida sampler

SSS Reference Chart

Birthday Cards
I made not one, but two cards.


 Only the top window contains a Loopy Flower Stitch.

Isn't it nice in spite of its simplicity?

Wednesday 17 October 2018

WIPW - Piling Up

It has been a reasonably good week and the Work In Progress Report contains the following:

Crazy for Crazy

I have added some more seam decorations on the Sweet Potato and Roast Chestnut block.


Cathedral Window

For this challenge with my friends Julie and Tanya I am following the instructions from Instructables.

Last week I showed how to press down the seam allowance of the cut pieces, and how to fold a piece in half and whip the seams together.

These are the next steps I follow to make a block:
Turn the block so the right side is out. Take care to make sharp corners.

Join up the two seams and stitch.

The instructions said whip the seam, which I did for the first half (lower seam in the picture). 
On my own initiative I then I stitched the other half (upper in the picture) with Ladder Stitch.
It was much faster and looks neater.

The last step is to fold the corners into the centre and stitch them down.

I have completed eleven blocks out of twenty so they are piling up nicely!


Sunday 14 October 2018

Sunday Stitch School - Lesson 76: Loopy Flower Stitch

Welcome to a new lesson at Sunday Stitch School.
Today we are focusing on a beautiful stitch I found on a German website - Pumora Simplify Embroidery.

The stitch is called Loopy Flower.

You need the following things:
Fabric
(Embroidery hoop)
Thread for the flower (I used yellow)
Thread for the stem (I used green)
Thick pen/stick, or anything you can wind the thread around.

Then follow these steps:
 Take a small stitch.

 Wind the thread around the pen/stick

 Pull out the pen/stick carefully so as not to disturb the loops.

Pull the threaded needle through the loops.


Anchor the loops next to the first stitch.


Secure the stitch with a knot on the back. Cut the thread.


Change to the thread that will be used for the stem. With the tip of the needle open up the loops of the flower and take some straight stitches to fix the loops.


When the loops are secure, stitch the stem. I did mine with Stem Stitch.


 I then added a Detached Chain Stitch for a leaf.

 The pictures on Pumora's website are better than mine, you can see the tutorial here.

Homework: 
Aida Sampler
SSS Reference Chart
and as you are short of time, use the stitch for a birthday card.