Thursday 31 May 2018

Tokyo International Great Quilt Festival 2019 - Partnership Quilt project - House


This is the block I made for the Partnership QuiltProject in 2005, when the theme was School House. 


It is time to make a quilt block for NHK's Partnership Quilt Project at Tokyo International Great Quilt Festival 2019, to be held in Tokyo Dome in January next year.

More information can be found on the official website. Sorry only in Japanese.

Under the tag NHK, above, you can read about this project and see my previous entires.

The theme this time is HOUSE.

In tonight's TV program and on the website, the suggestions are many and free. 
When I discussed the theme with a friend I reflected that there are a lot of different houses - human dwellings or workplaces - igloos, tents, tree houses, dollhouses, churches, garden sheds, bird houses, garages, summer houses, shops, log cabins, boat houses, house boats, or houses on stilts, temples, sand castles, caravans, corner shops, telephone booths, and why not a band stand in the park or a bus shelter…. I mean a bus shelter is often the only house a homeless can find to ‘live' in.  
Then there are the parts of a house - Santa stuck in the chimney, a cat in the window, an open and welcoming door, the ruined remains of a castle or a heap of plank being what is left of a house destroyed by the tsunami, or a heavily graffitied wall...

The rules are, 
  • size 15x15 cm + seam allowance of 1-2 cm
  • no quilting,
  • name in lower right corner,
  • enclose a self addressed 62yen postcard, if you live in Japan and want to know in which quilt your block has been added
  • DEADLINE: 31st JULY 2018, when the block must have reached NHK
  • send to: 
Partnership Quilt
 NHK Sutekini Handmade
 2-2-1 Jinnan
 Shibuya-ku
 Tokyo 150-8001
Japan

Now what house will I make?

Wednesday 30 May 2018

WIPW - Building up Froth on the Guinness

Work In Progress Wednesday, yes there has been progress on

Crazy for Crazy

where the pieces were assembled into a block.
Then the tan embellishments began frothing all over the place.

I usually like to add the beads last, but some stitches are beaded stitches and had to be worked before the remaining embroidery and ornaments can be put in.
The piece on the right with machine embroidery is the same as that on the ruby red block, if you remember. Here I used the back of the fabric.

Sunday 27 May 2018

Sunday Stitch School - Lesson 62: Pearl Stitch

For an easy and attractive linear stitch I offer you Sunday Stitch School's stitch #62, the Pearl Stitch.
The Swedish name is Knapphålsstygn På Högkant! A mouthful in any language!
Updated: French names, Point Perlé, Point de Perle, Point Mille Pattes

I have found Pearl Stitch or Pearl Knot Stitch in these books, but they vary slightly in the instructions.


My favorite instruction is online at Sarah's Hand Embroidery Tutorials.


Work it from right to left,
like this:


The result when worked over three vertical holes, or two, on this Aida.


Homework:
Aida Sampler
SSS Reference Chart
A rectangular line on the linen cloth

Friday 25 May 2018

Friday Homework for Lesson 61: Raised Fishbone Stitch

My biggest impression of this stitch?

It's a thread eater. I had to re-thread the needle several times to complete the Aida Sampler, and for each time I felt I was wasting thread. I also noticed that it is hard to make leaf shaped patterns on Aida, that is why I just made a band. It looks good, but was tedious to make and used up a lot of thread that could have been used on another project.

Now for the pictures
 On the teal tailoring wool scribble cloth, two leaves in Perle #12, they could be fish!

 Sunday Stitch School Reference Chart! So much easier to work on plain weave cloth than Aida.

A dim picture of a band of Raised Fishbone Stitch on the Aida Sampler.This is not a good choice of fabric for the Raised Fishbone Stitch.


Wednesday 23 May 2018

WIPW - Crazy for Guinness

With one thing and another it has been a busy week. The result? There isn't much to report on Work In Progress Wednesday.

Crazy for Crazy
It took me some time to decide which colour to use for the next crazy quilt octagon block. Then I saw an advertisement for that Irish drink, and I got 'Crazy for Guinness'.

I sorted out my stash of black, and it was quick work as I have very little of that colour. The embroidery and embellishments will of course be in tan, and luckily I have a bit of that particular shade of light brown/beige.

This is as far as I have got! More digging among thread, beads, and maybe I have to do a bit of dyeing.

Monday 21 May 2018

STUMPWORK TUTORIAL - Millinery and Hat Making

Previous parts of the tutorial can be found here:


Part 7 - Millinery and Hat Making


Here is the seventh part of a tutorial for stumpwork portraits, inspired by Fay Maxwell, whose excellent book Ladies with Hatitude I warmly recommend.

MILLINERY AND HAT MAKING

There are many materials that can be used to make a hat - fabric, felt, lace, yarn, fur...


The simplest of fur hats, a small rectangle!

A lace flower can be cut out and draped over the head.

Let's make a hat out of a piece of felt:
Cut out a piece large enough for the brim and the crown.


Cut out the rounded crown

 Stitch it down around the top of the head.


The brim should now stand out.

With pins, try out how to shape the brim.

Like this? Then stitch it down.
 
 The brim can be decorated with some stitches.


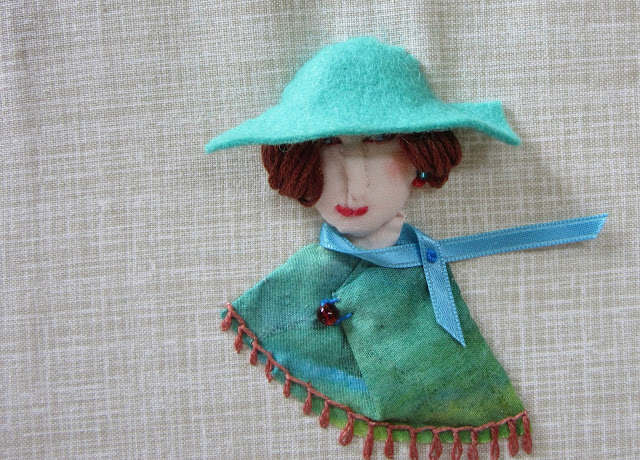
Now, let's make another hat, using the same fabric used for the coat.
Take a strip of fabric, gather it in the middle, and cut off.

Drape the gather over the top of the head.

 Stitch it down.
 Fold in the raw edges to shape the crown of the hat.

Fix the two far edges of the brim to the background so the brim stands out.
For a simple decoration on the hat, take a piece of felt,

 gather it, and stitch down.

Instant glamor, even if the brim has a raw edge!

For ideas and illustrations of various hats check out this list.

I usually make my portraits into cards by stretching the fabric over a piece of cardboard. Click here to see.

Here ends the basics in Stumpwork Portrait making. In future I will post alternative ways to arrange hair, make garments and so on.
I hope you have enjoyed this tutorial and will have a go!

Sunday 20 May 2018

Sunday Stitch School - Lesson 61: Raised Fishbone Stitch

In my neck of the woods the trees are showing off their new leaves, so I thought we should do a leaf-shaped stitch today.

Here is Raised Fishbone Stitch,
and I hope the pictures are enough to explain the way to stitch it.


Beware, this stitch is certainly a thread-eater!

Mattia tells me the two names in French are:
Point d'arête en relief
Point de passé plat croisé 

Homework:
SSS Reference Chart
Teal tailoring wool scribble cloth
Aida sampler, if possible.

Saturday 19 May 2018

STUMPWORK TUTORIAL - Hairdressing and Final Touches

Previous parts of the tutorial can be found here:


Part 6 - Hairdressing and Final Touches


Here is the sixth part of a tutorial for stumpwork portraits, inspired by Fay Maxwell, whose excellent book Ladies with Hatitude I warmly recommend.

HAIRDRESSING and FINAL TOUCHES

The most enjoyable part of making a portrait is hairdressing.
Hair can be made out of stranded floss, yarn, banana silk, or almost anything...

long and windblown

a perm gone wrong,

a shade to go with the dress?

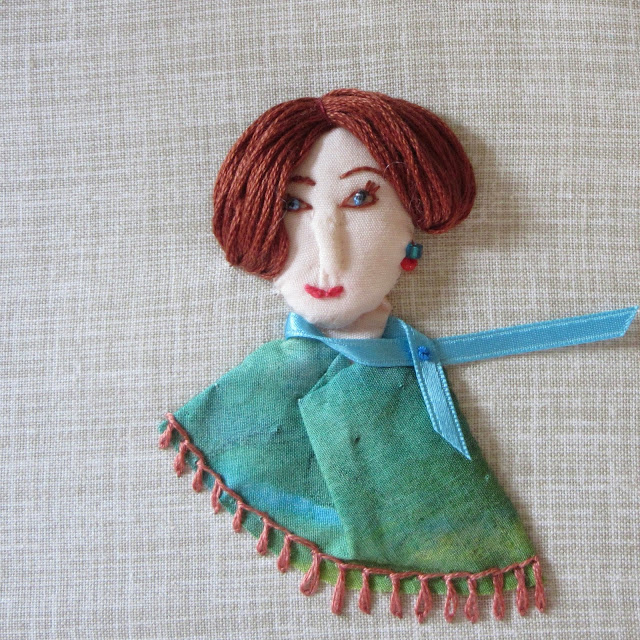
I settled for stranded floss,

and made a number of loops.


fixed them at the top of the head

and the sides,

tightened and tucked in any stray strands.
I then stitched a couple of beads for earrings.

I added a fastening for the dress.
A bead fixed loosely with string.

 to make the loop.


Finally, I added a blush with a red pencil.


We are nearing the end of this tutorial for the basics. I hope you have enjoyed seeing the portrait grow, and maybe have had or will have a go yourself. The perfect way to use up those small pieces of scrap fabric.

A request for millinery has come in. So I will make one more tutorial part, for making hats.
This will be posted on Monday.

Then I will in future add further tutorials for many more hairstyles, hats, clothing....