Part 1 Getting Started and Making the Head

Let's get started.
I first collect the following
MATERIAL

- Embroidery hoop
- Fabric for the background, enough to fit into the hoop
- Fabric for the face and neck
- A ball of wadding for stuffing
- Fabric scraps and ribbons for clothes
- Beads and buttons for decoration
- Sewing thread to match the skintone of the face
- Stranded floss for the outline of the eyes, eyelashes and eyebrows
- Stranded floss for the iris
- Black sewing thread
- White sewing thread
- Stranded floss, yarn, sari silk... any fiber for the hair
- Needles
- Pins
- Scissors
HEAD and NECK

Cut out a round or oval shape, stitch a line of Running Stitch along the edge.

Place a ball of wadding in the middle and pull the thread

Gather the fabric round the ball of wadding and stitch it shut.


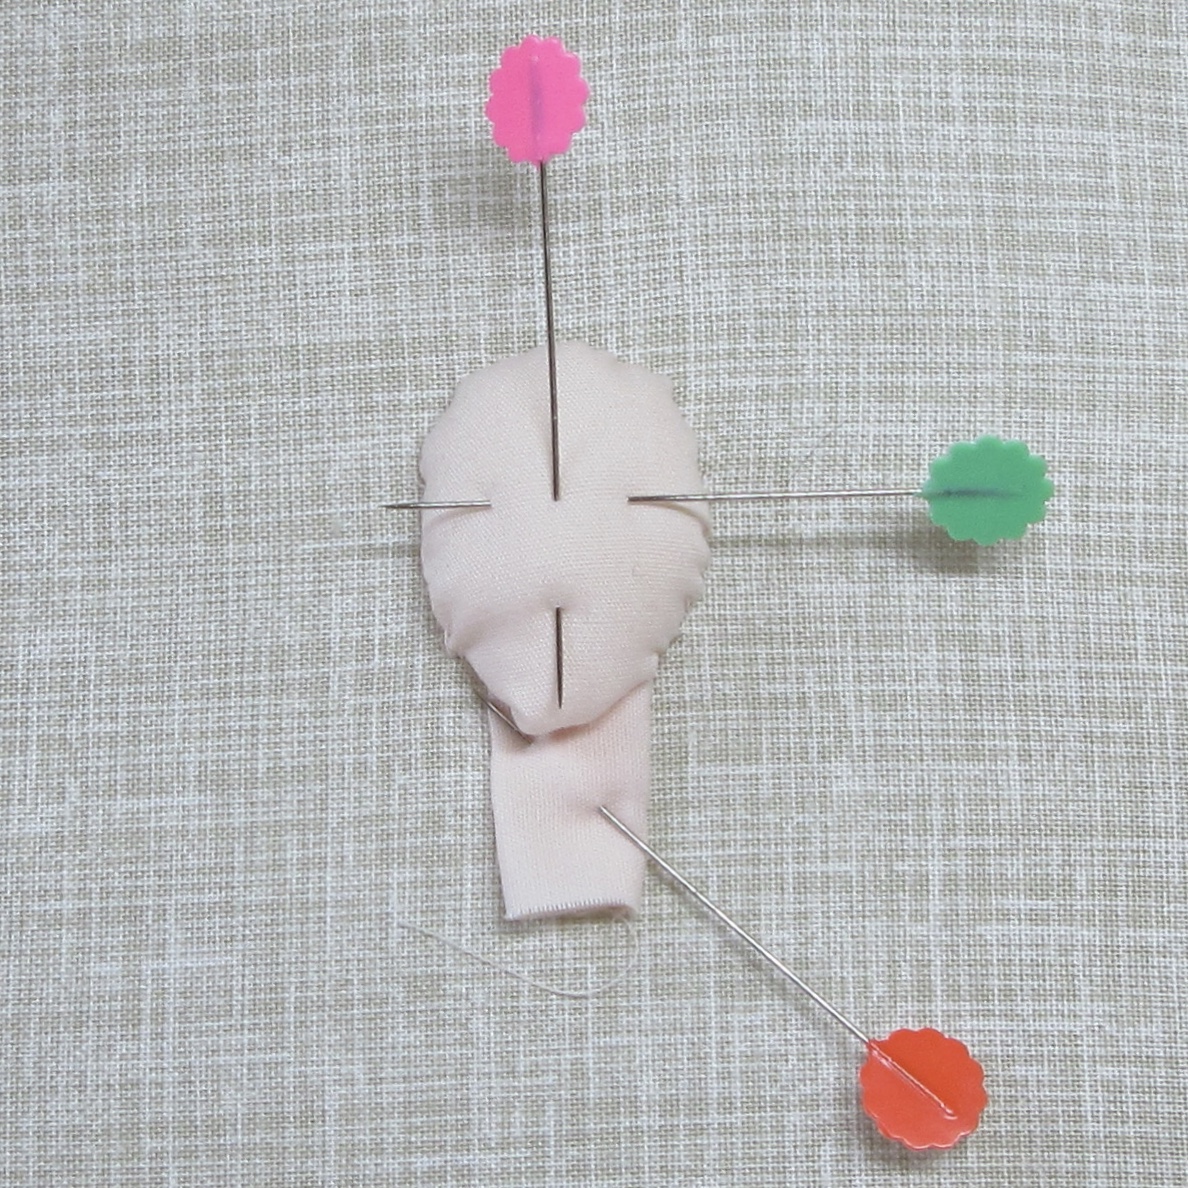
Fold the piece for the neck to a width that is in proportion to the head. Fix it to the background fabric with a pin.

Place the head on top of the neck.
Stitch the sides and top of the head to the background. Even out any puckers.

PART 2 - NOSE
Stitch the nose like this:
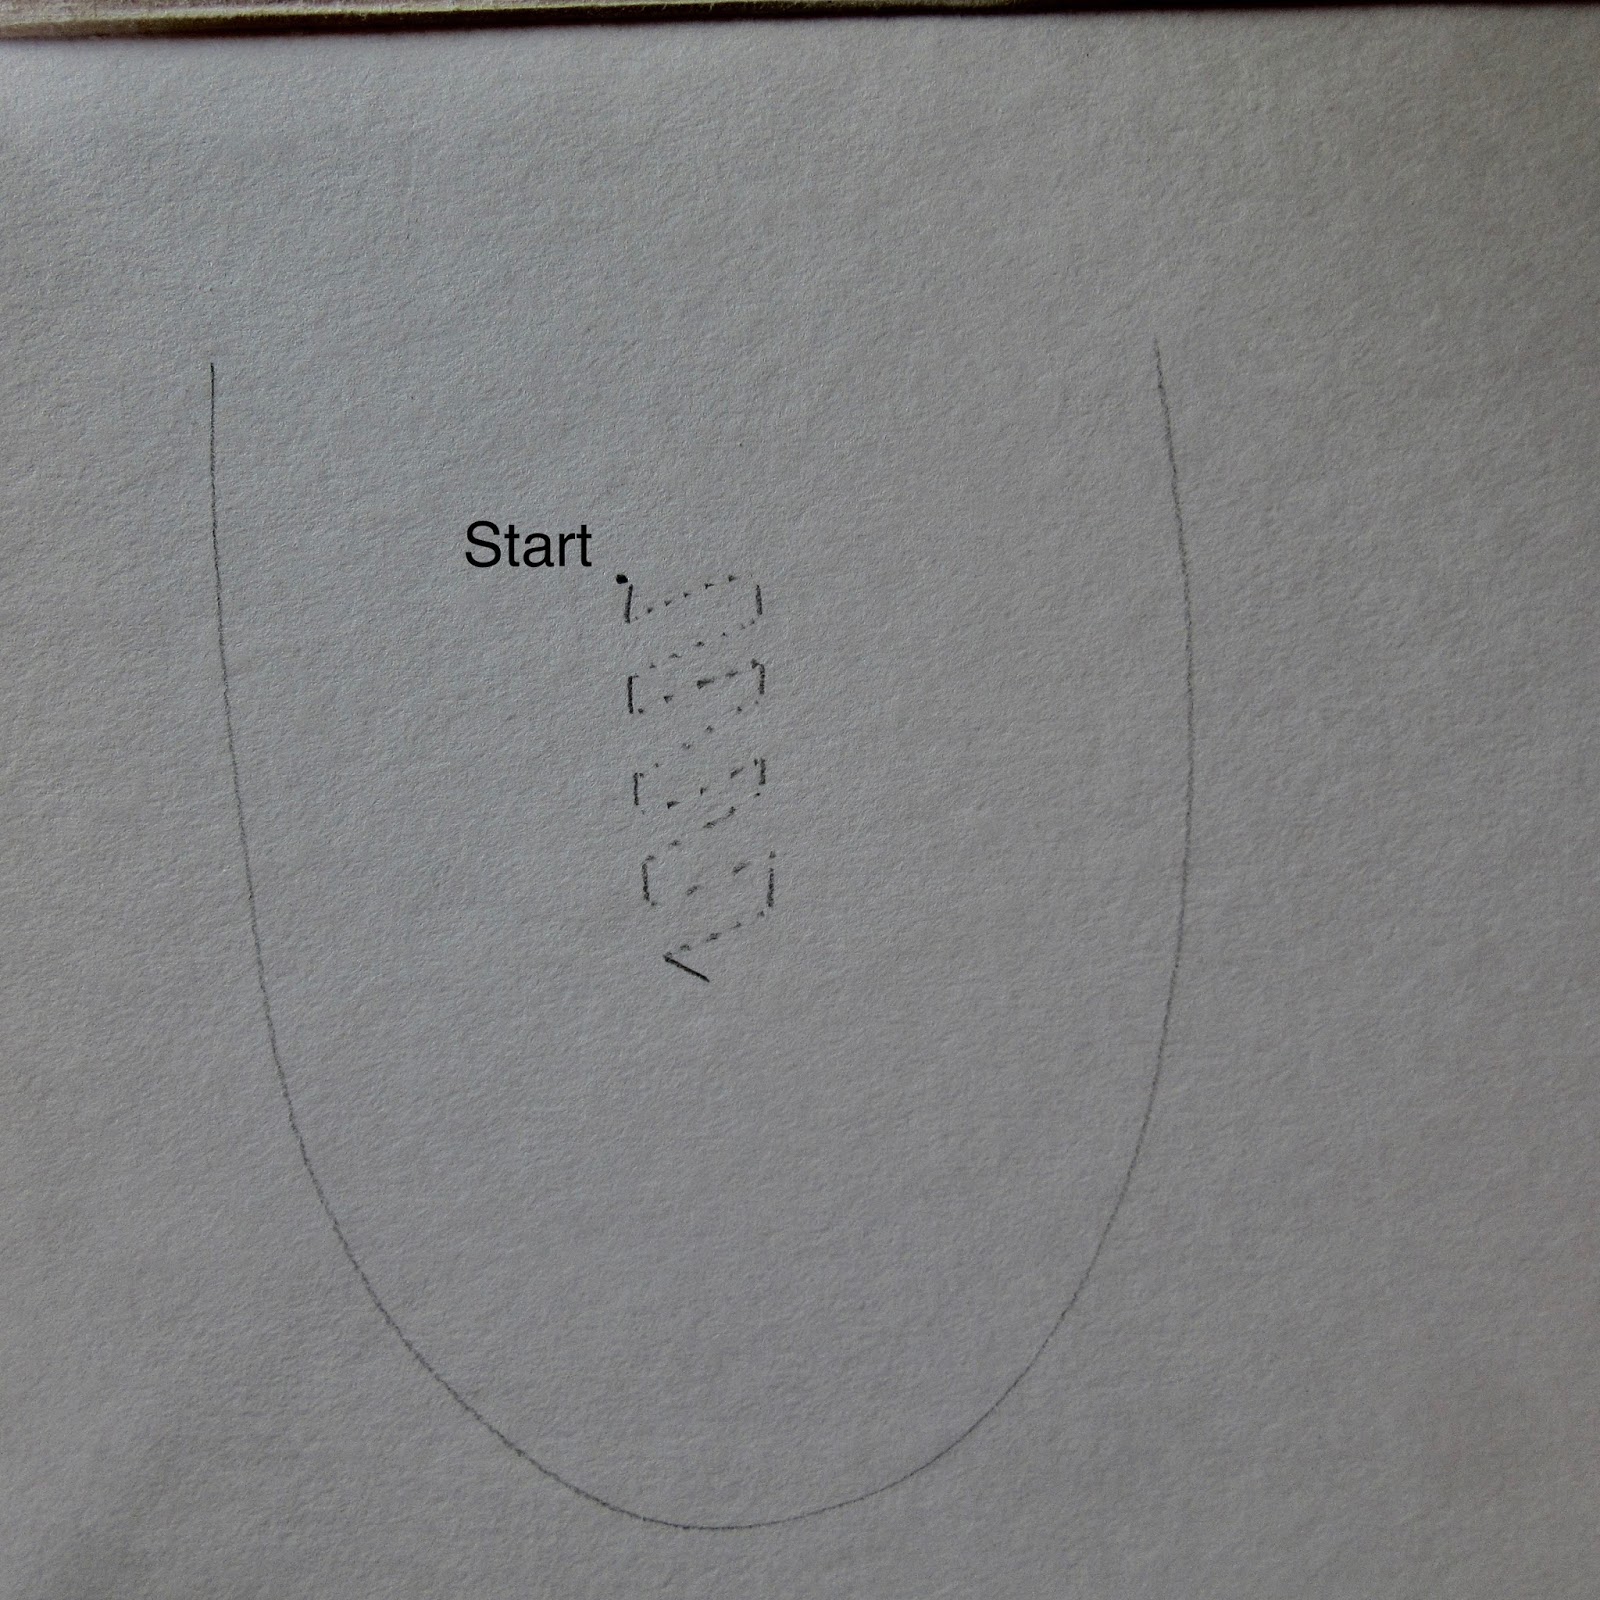


Continue down the nose.

Pull the thread until you have a nice ridge for the nose.

Make two stitches to shape the end (tip) of the nose.
PART 3 -EYES

Take one strand of floss in a colour suitable for the outlines of the eyes.

Starting at the root of the nose, make a Lazy Daisy Stitch (Detached Chain Stitch). Anchor with a short Strait Stitch that will look like part of the eyelashes.


Make the rest of the eyelashes with Straight Stitch. Make sure to catch the eyelid (upper part of the Lazy Daisy Stitch).


The eyebrow is made up of Stem Stitch.


Make the other eye in the same way.

Pick the colour you want for the iris. Two strands of floss.

Make a French Knot and place it in the centre of the eye.


You need black sewing thread for the pupil, use a long thin needle and place a French Knot inside the iris.


Make sure to fasten this black thread on the back, too.

For a nice glint of light in the eye (which really brings the eyes to life), make a short Straight Stitch between the iris and pupil.


Don't pull too hard, make sure you see just enough of a glint of white, but fasten the white thread on the back.

Make the other eye in the same way.
PART 4 - LIPS

Use two strands of either skin-toned thread for a natural look, or a lipstick colour.


Two Straight Stitches for full lips and a serious look,

or two Lazy Daisy Stitches for a sweeter look.


PART 5 - BEHIND THE NECK and CLOTHING
If you want a scarf, necklace or collar to go behind the neck, this is how to add it.


or a string of beads.
Here is how I used a scrap of fabric.

Place it behind the neck,


and fasten with a bead.
To make a coat with a collar,

fold the 'collar' and turn over


Turn in the raw edges.
(As you can see, there is no need to cut the scraps to shape. By turning in the raw edges you will get a bit of bulk and that adds to the 'padded stumpwork' look.)
Make a simple ruffed collar by gathering a strip of fabric.


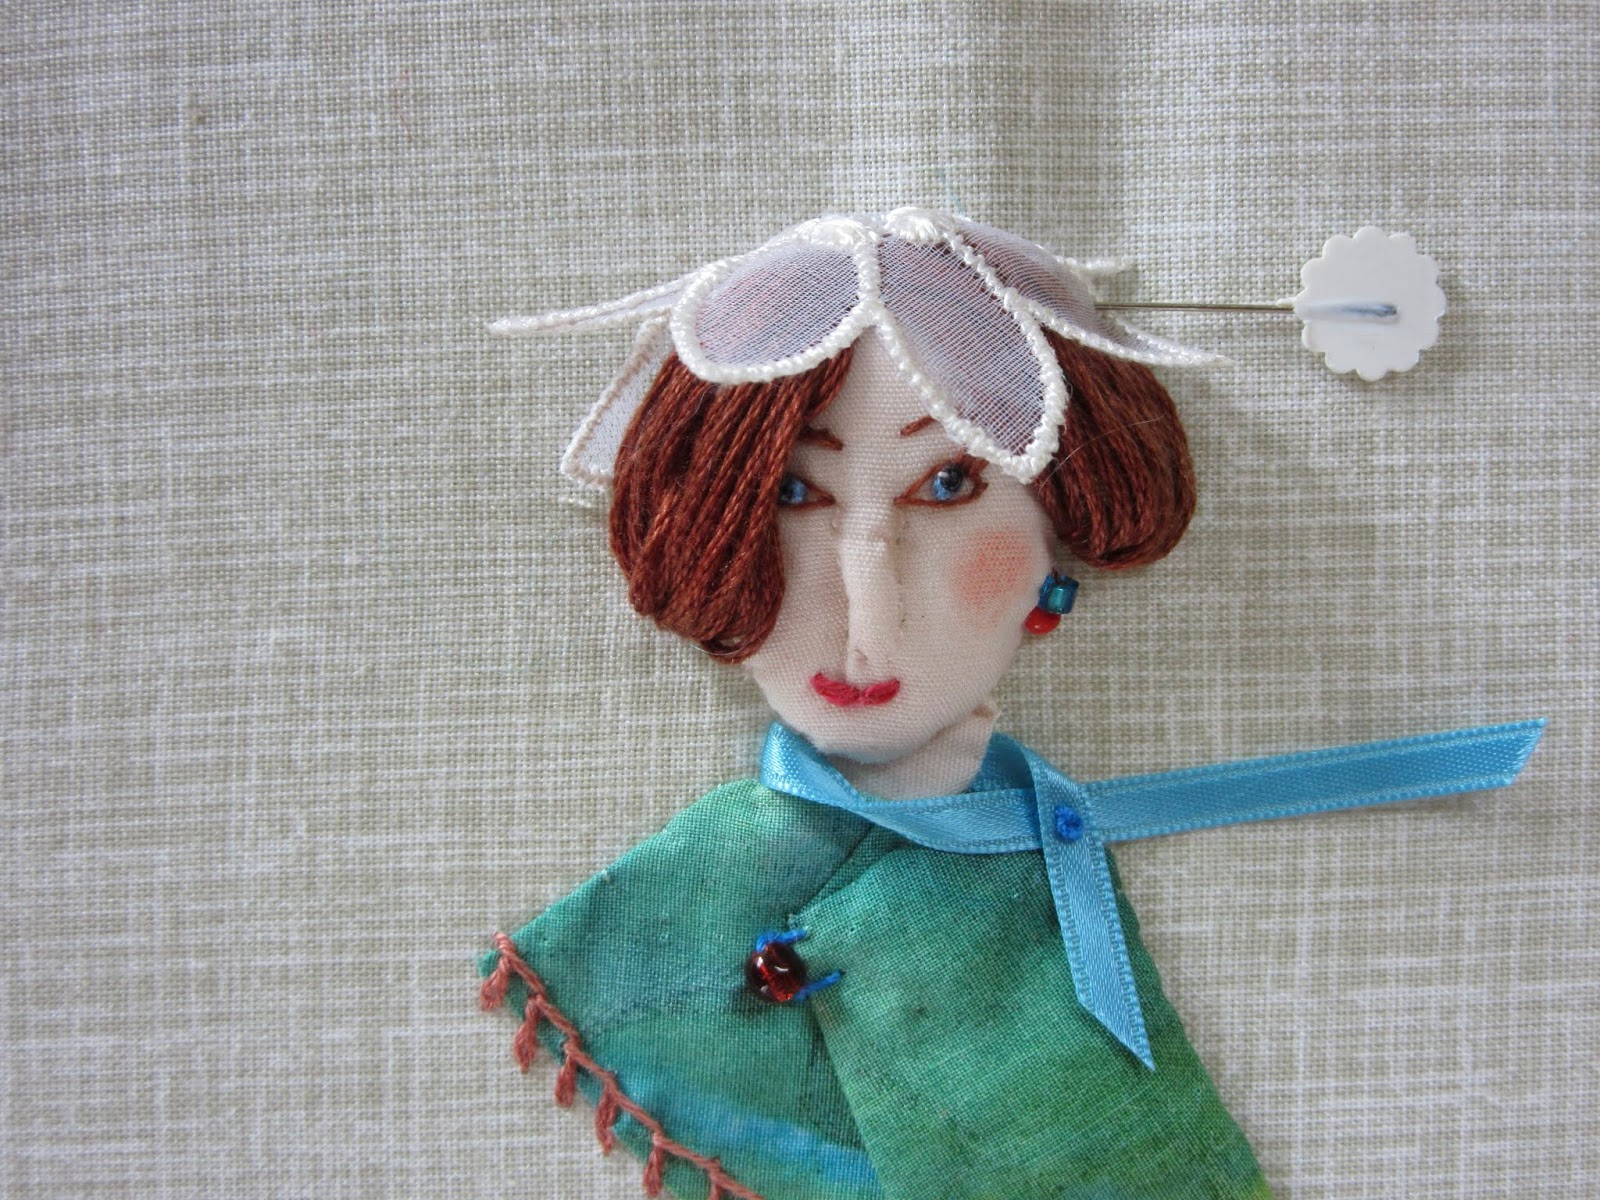
I finally dressed this portrait like this:

I took a scrap of fabric in an odd shape,


I slipped a ribbon behind the neck.
Before doing anything else,
I finished the face by stitching down the neck and the chin to the background fabric,

and evened out the chin line.

Then I stitched the sides and top of the 'dress'.
A smart way to decorate the clothes is to use embroidery stitches.
I selected the Basque Stitch

to make a fringed edge at the bottom.

The ribbon was fixed round the neck with a French Knot, and cut.


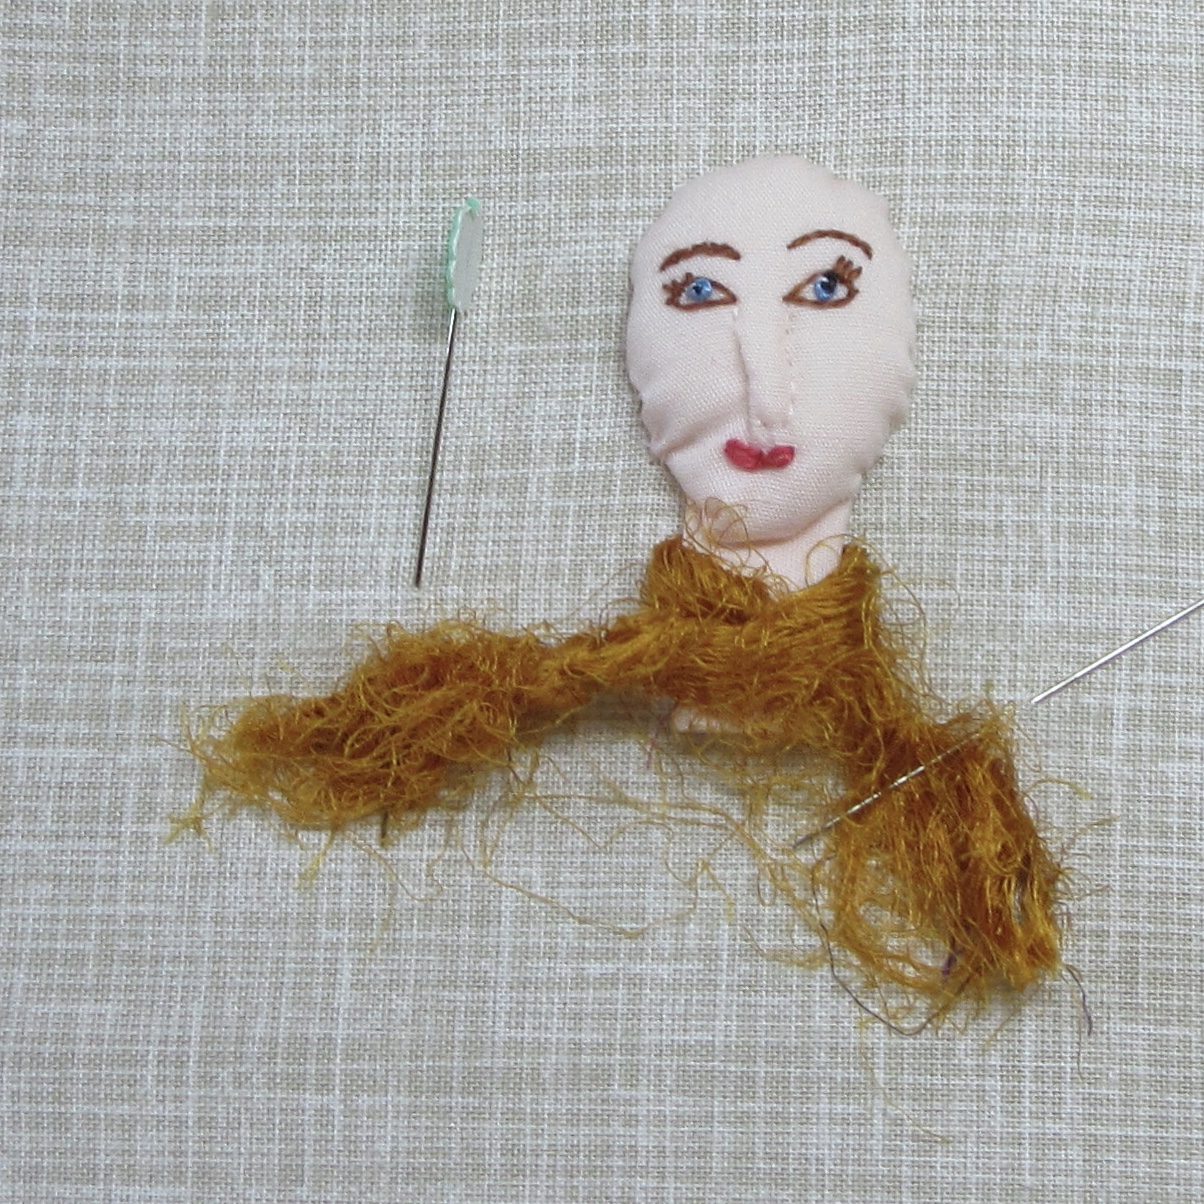
Hair can be made out of stranded floss, yarn, banana silk, or almost anything...

long and windblown

a perm gone wrong,

a shade to go with the dress?
I settled for stranded floss,

and made a number of loops.
fixed them at the top of the head

and the sides,

tightened and tucked in any stray strands.
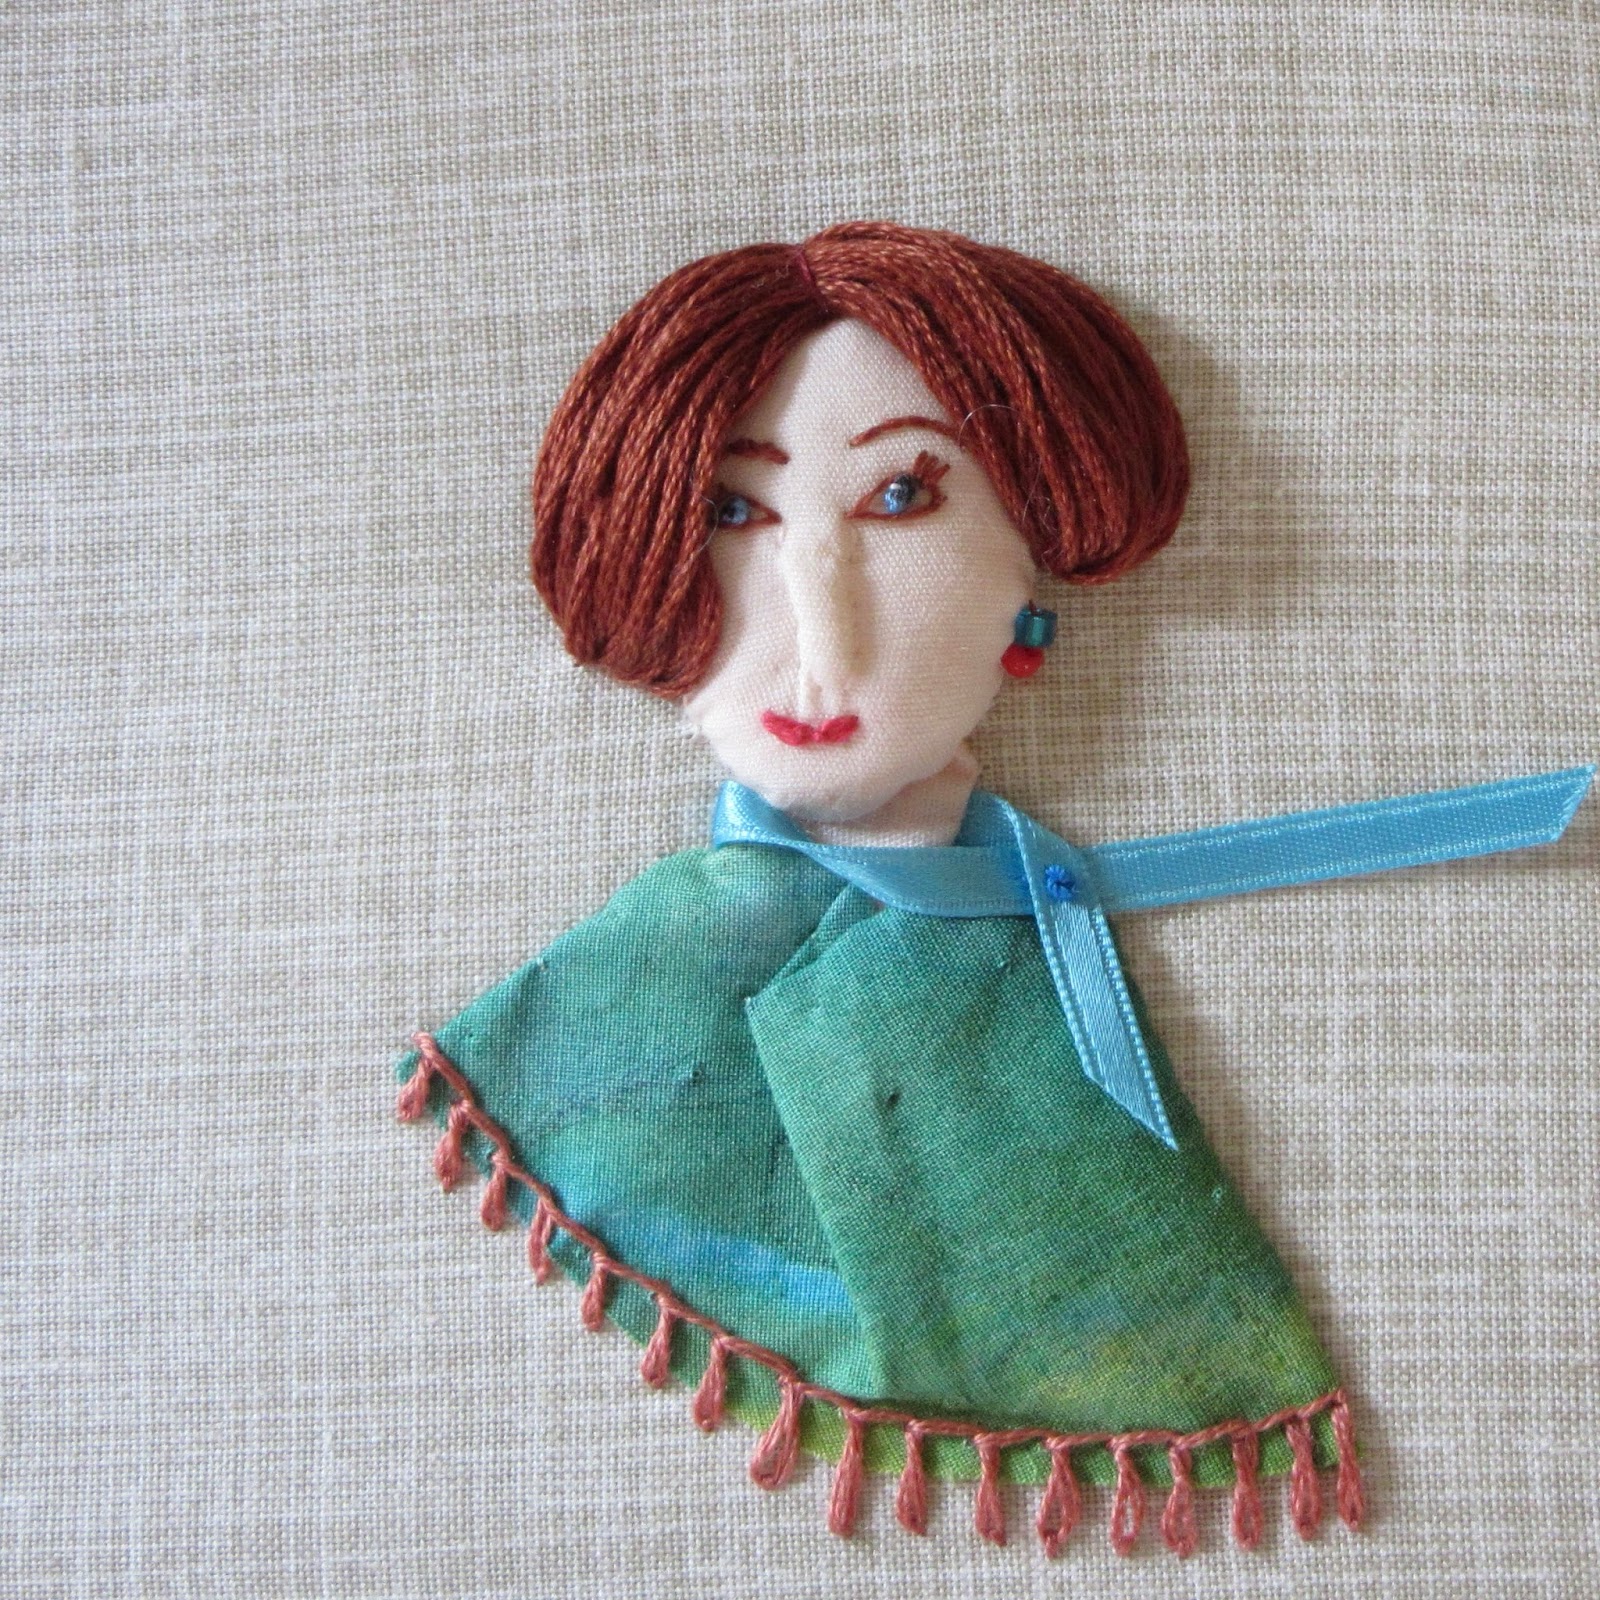
I then stitched a couple of beads for earrings.
I added a fastening for the dress.

A bead fixed loosely with string.


Finally, I added a blush with a red pencil.

Now how about giving her a name?

Part 7 - MILLINERY AND HAT MAKING
There are many materials that can be used to make a hat - fabric, felt, lace, yarn, fur...


The simplest of fur hats, a small rectangle!
Let's make a hat out of a piece of felt:

Cut out a piece large enough for the brim and the crown.

Cut out the rounded crown


The brim should now stand out.


Like this? Then stitch it down.

The brim can be decorated with some stitches.

Now, let's make another hat, using the same fabric used for the coat.

Take a strip of fabric, gather it in the middle, and cut off.

Drape the gather over the top of the head.


Fix the two far edges of the brim to the background so the brim stands out.
For a simple decoration on the hat, take a piece of felt,
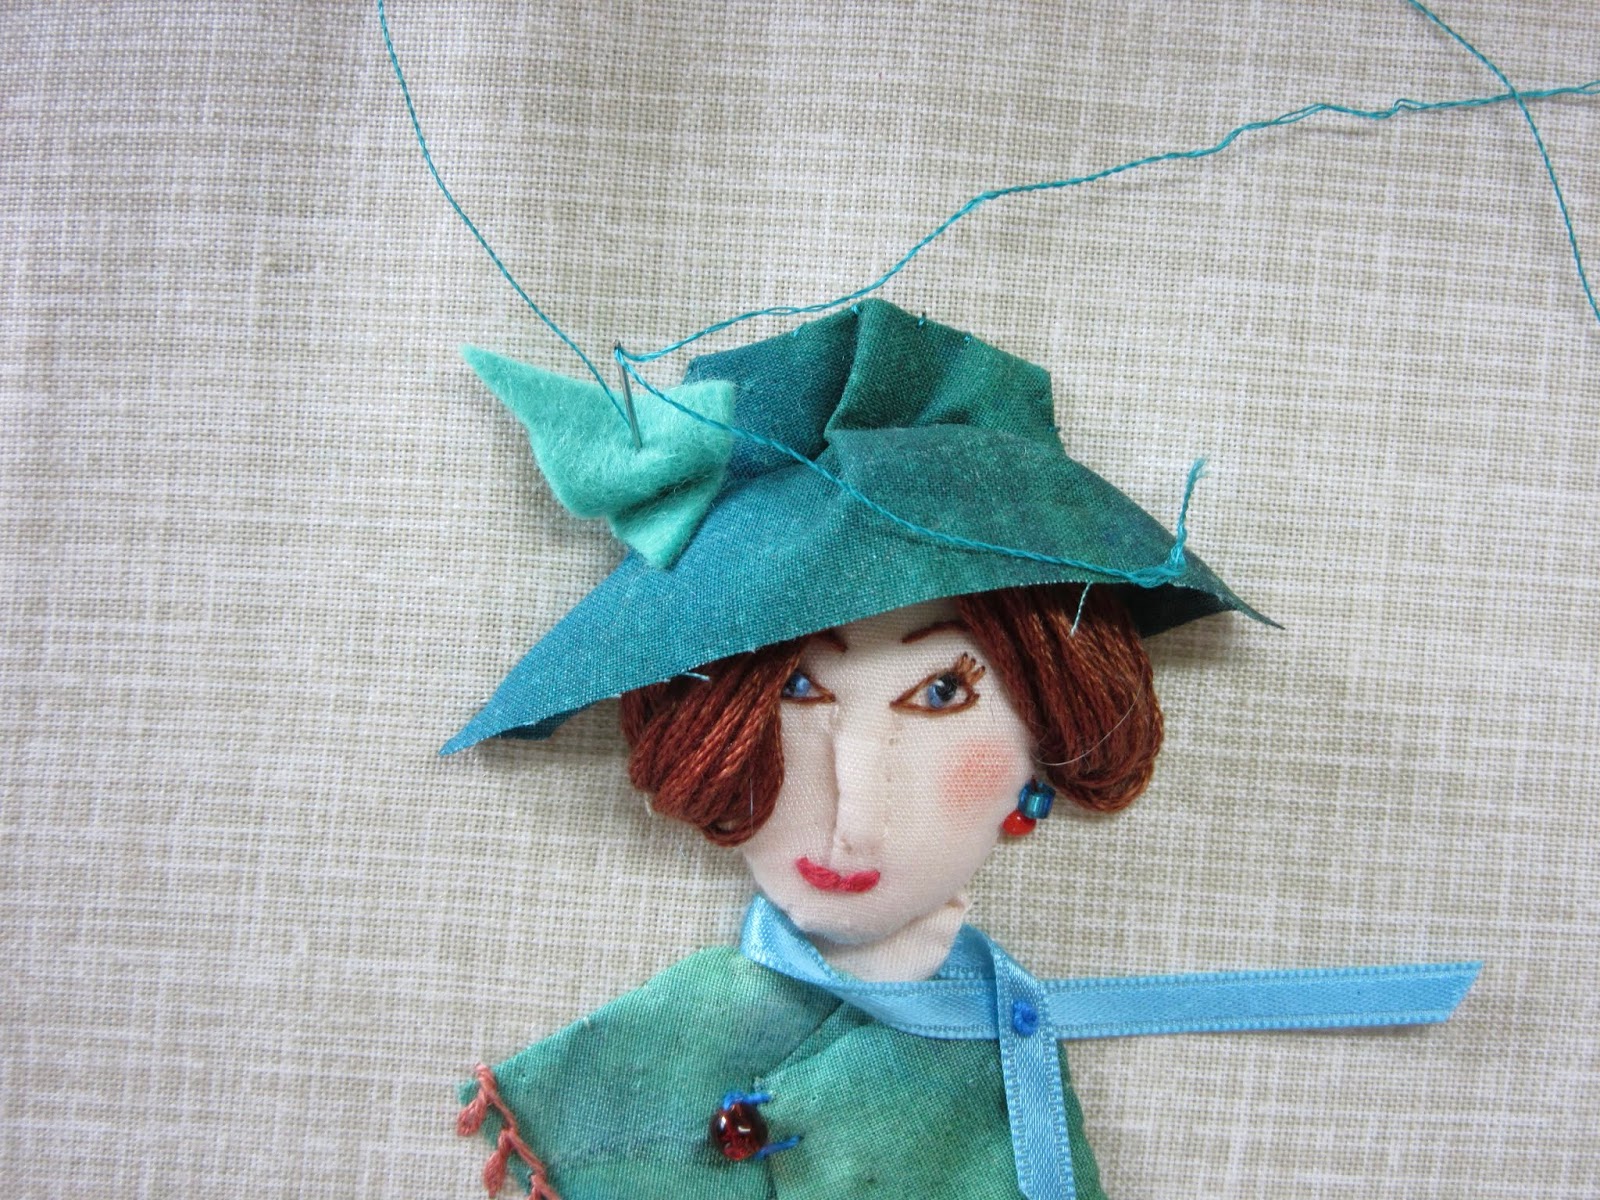

Instant glamor, even if the brim has a raw edge!
For ideas and illustrations of various hats check out this list.
6 comments:
Thank you for this great tutorial! I made a portrait, and it was a lot of fun. I may have to make more! http://highroadquilter.blogspot.com/2018/05/learning-crochet-and-stumpwork.html
Thanks again for the wonderful tutorial..I made three ladies.(posted in my blog). I am thinking of of buying a book learn more.
Thanks so much for this tutorial. I am almost finished with my First Lady and look forward to doing many more!
I just saw a post about Sally Mavor's quilt that may be made with stumpwork, I'm not sure, but I wanted to make sure you saw it, because this tutorial reminded me of it. https://weefolkstudio.com/2016/03/20/cover-up-part-1/
Thank you so much for this tutorial! I made my first portrait yesterday - see her here: https://www.thecrafties.com/2020/04/stumpwork-portrait-irma/
I had a lot of fun with it, and loved seeing the personality take shape!
You are amazing! Thank you so much for the tutorial (I know a lot of time went into it) and for the inspiration! I just have to give it a go. You are very talented, well done!
Post a Comment