I hope this will explain how, but I fear it might confuse!:
The cubes have a filling of rubber foam,

- You need 8 cubes of rubber foam, 4x4 cm.
- You need 6 different fabrics (I used the prints seen below). Cut them into 4x4 cm squares and 4x8 cm rectangles.
- Add 0,7 mm seam allowance on all sides.
- You need plenty of pins, sturdy thread and a needle.
- Optional, press interfacing on the back of the fabric.
- Finger press the seam allowance


Fabric #1 purple polka dot Cut 4 squares and 2 rectangles
Fabric #2 hedgehogs and mushrooms Cut 4 rectangles

Fabric #3 cats Cut 4 squares and 2 rectangles

Fabric #4 flowers Cut 4 squares and 2 rectangles

Fabric #5 berries Cut 4 squares and 2 rectangles

Fabric #6 black and white stripes Cut 4 rectangles

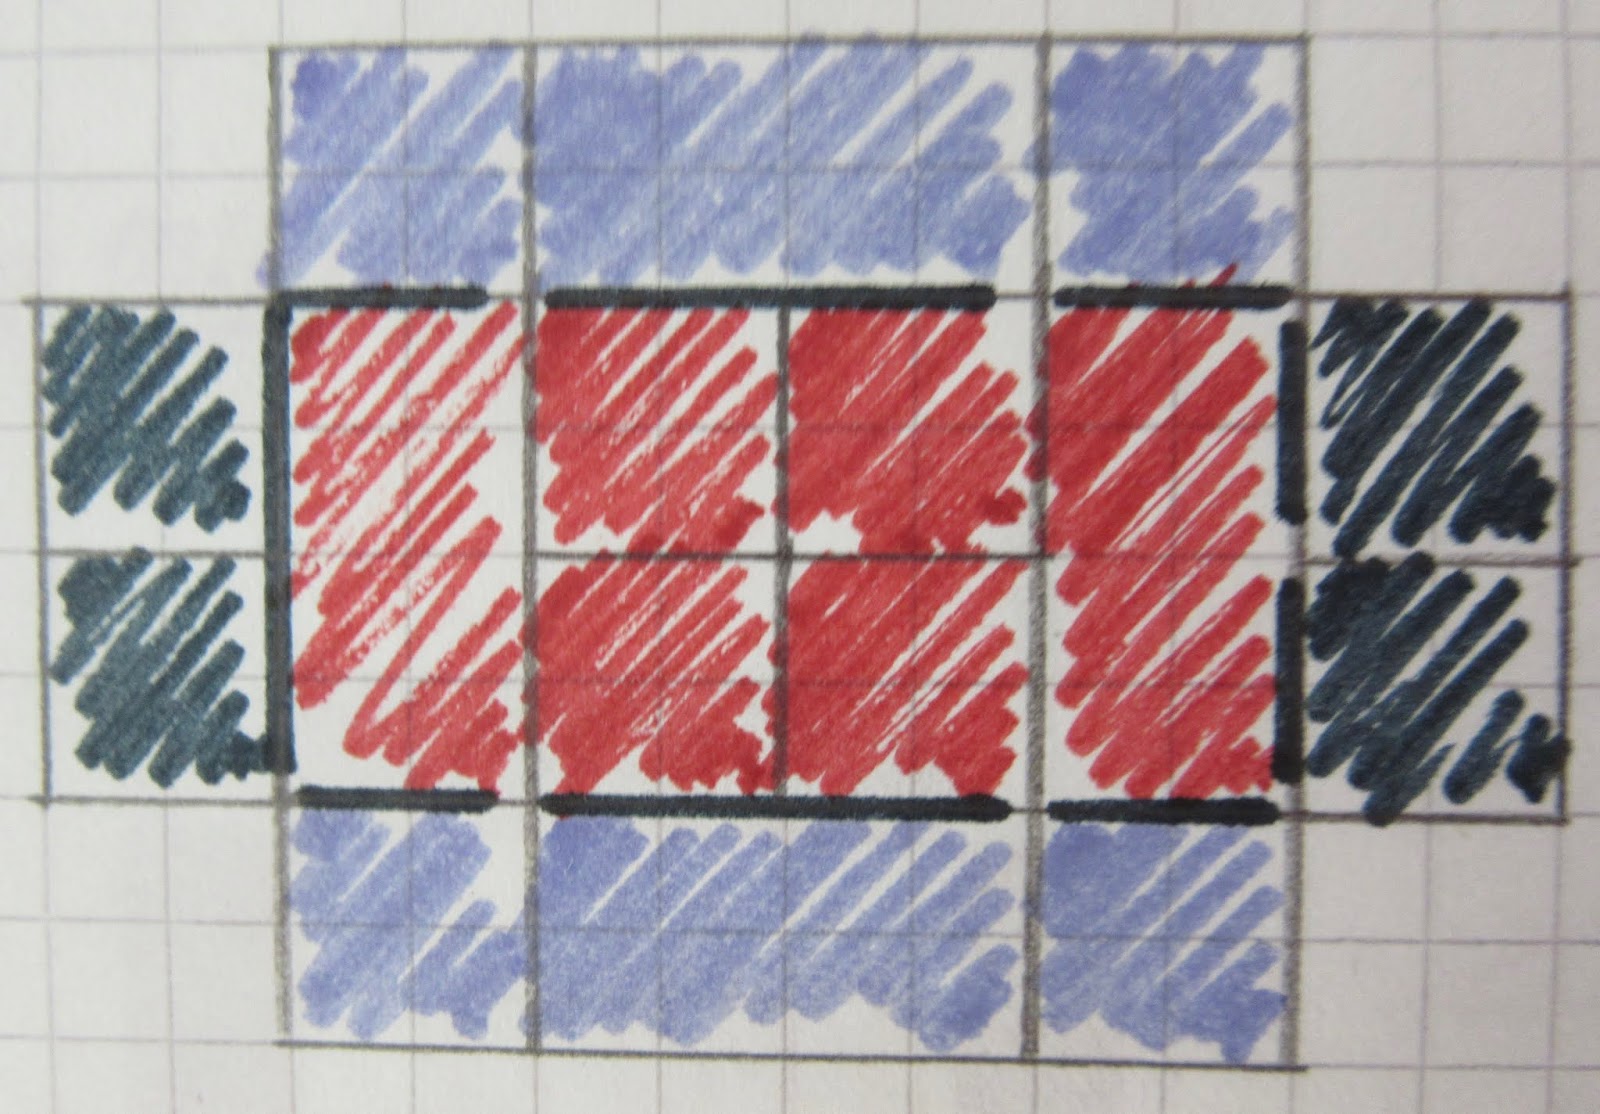
Place the rubber foam cubes in two rows, and pin the fabric onto them like this:

#2 front and back of cubes
#5 sides of cubes
So begin with #1 (purple) on top
and #2( hedgehogs and mushrooms) on the long sides

and #4 (berries) on both short ends

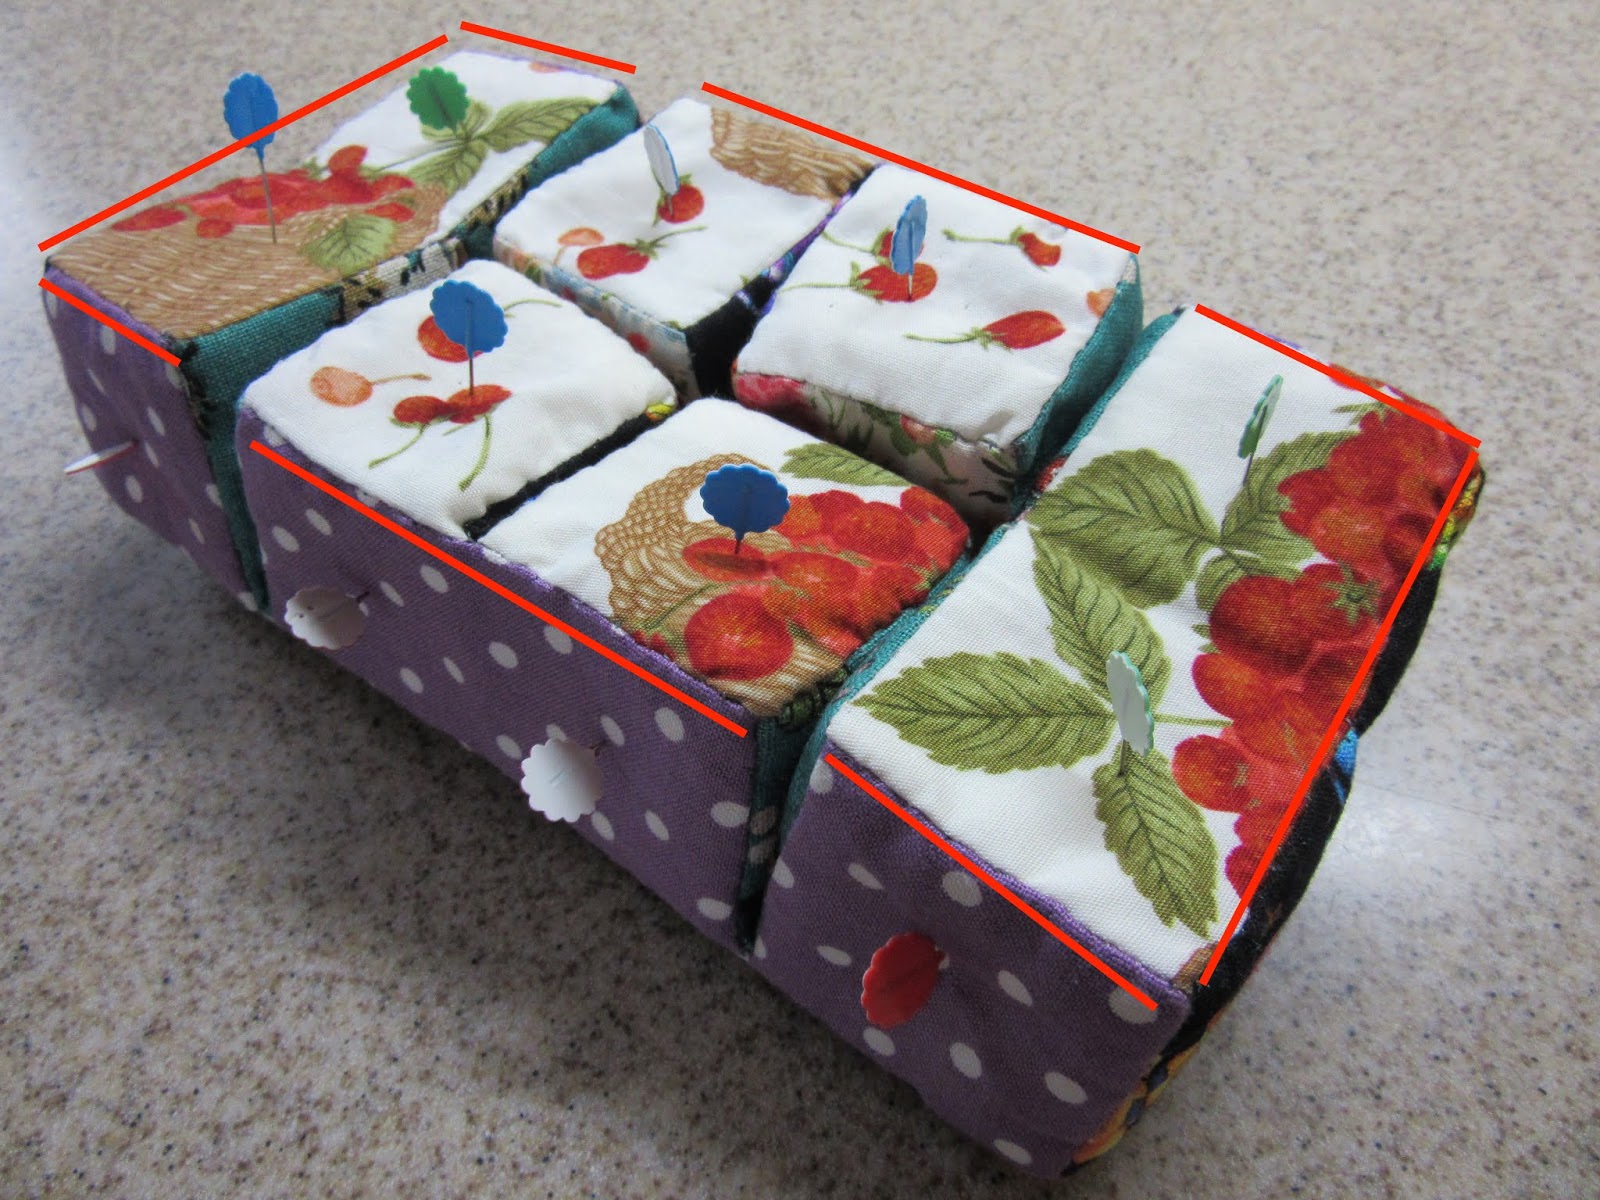
Now stitch along the red lines.
Use a ladder stitch.

When you have completed that job,
fold the cubes so the purple fabric is facing

#2 (hedgehogs and mushrooms) is now seen on top.

Pin #4 (flowers) on the long sides

Next step, turn everything upside down


Now pin #3 (cats) like in the picture. Note the placement of rectangles and squares.
Stitch along the red lines.

When that is done, fold the cubes so #3 (cats) is facing


#4 (flowers) is now on top

Continue in the same way and stitch the outer edges.
When you are done, fold as if you were closing a book.

Here comes the trickiest part.
You can now see #4 (berries) gradually on top as #2 (hedgehogs and mushrooms) are facing.


When you can see all #4 (berries) on all the blocks you are home free!
Stitch along the red lines.
Turn everything upside down.


Finally pin #6 (stripes) to the top and stitch

This is tricky, but if you are patient and careful, you will have a nice toy!
4 comments:
Thank you so much for this tutorial! I'm honestly not sure if I can wrap my mind around how to do it but I will try once I get hold of some foam!
Very nice tutorial. it is very interesting to see the steps , for that i want to try this out.
Wow! Your tutorial looks great, Queenie!
You are very clever to work this through.
Hugs,
Barbara xx
Thank you for this tutorial! I always wondered how these blocks worked, but never took the time to draw and figure it out!
Post a Comment