Thursday 31 August 2023

What's in a Quilt - The Green Man - Part 5: Hexagon

The fifth quilt style included in the Green Man Sampler quilt is the hexagon.

The beautiful hexagon shape has been used to make many traditional-style quilts like Grandmother's Garden, which you can read about at Textile Research Centre.

Over the years at Tokyo Great International Quilt Festival I have seen some good examples of hexagons in quilts:

This Grandmother's Garden quilt was made by Chieko Yamaguchi*山口智恵子


Partnership Quilt Project 'Tree of Life', by Pamela Allen


Actually, my friend Pamela has made great use of the hexagon shape: Why not have a look at her temperature quilts and other creations. Click here.

Although it is possible to make a hexagon quilt by machine, stitching it by hand is one of the most rewarding, relaxing and pleasant ways to make a quilt.  Working in this old-fashioned way with English Paper Piecing makes me feel that I am going back in time and being part of history.

Basically, you stretch a square of fabric over a hexagon-shaped cardboard template and baste it in place. After you have a number you can start joining the hexagons together.  There are many tutorials for English Paper Piecing, here is my favourite by Mary Corbet.

Recently I made a birthday card with a Grandmother's Flower Garden flower. These hexagons are very small so I used another technique.
I blogged about the process here.

....................

I made my Green Man quilt block with various green prints. The eyes and mouth were fuzzy cut from Japanese tenugi fabric. (tenugi is a Japanese rectangular kitchen towel that can also be used in many other ways).
The background is also made up of small hexagons, and I mean small, each of the six sides of the hexagon is 12mm. Making this block took a lot of time and patience, but gave me a lot of joy!


Wednesday 30 August 2023

WIPW - Trudging On

 Work In Progress Wednesday report.


Mandala

I only added a few stitches to the lines of #223 Romanian Macrame Petal Stitch. These lines need to be longer before I can work out where to put the circular edge.


Sunday Stitch School Stitch Sampler

Here I added three stitches: #260 Laced Mountmellick Stitch (green and red metallic), #256 Quill Stitch (variegated thread) and #242 Double Wheatear Stitch (wheat coloured ochre).


Sunday 27 August 2023

Sunday Stitch School - Lesson 262: Star of David

Now that I know how to make a hexagon or six-pointed star template, it is time to learn the Star of David Stitch.

Have a look at Needle 'n Thread.


Tighten the fabric in a hoop and 

mark the six tips of the star on the fabric.


Work your way clockwise around the dots.
Take the thread out at the red star. 
Skip one mark and insert the needle
in the third dot,

and go back and out at the second mark.

Continue Back Stitching.

Keep this mantra in your head:

Two forwards and one back.


Gradually you begin to see the shape of a star.


For the last straight stitch, go over and under 

the previous lines as indicated by the red arrows.


Homework: Add stars on these samplers.


Friday 25 August 2023

Friday Homework: Preparatory Lesson - Template Making

I didn't set a homework task for today. However, I needed to make a birthday card and decided to use the hexagon shape to make a Grandmother's Flower Garden design.


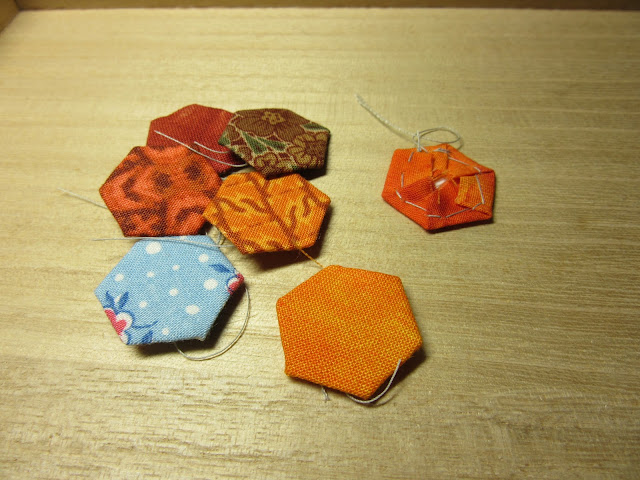
So a small hexagon template was drawn and cut out, and seven tiny hexagons were prepared like this:

Things needed: hexagon cards, scraps of fabric, the smallest size Clover clips, needle and thread, scissors.

I folded the fabric over a template and clipped it in place.

Then I basted the fabric over the card.


Next step: Joining the hexagons together. I whip stitched an orange hexagon to each side of the blue, centre piece.

To be able to join the orange pieces to each other, the card in the centre needed to be removed.

I turned the flower over.

The basting thread was snipped and the hexagon card was carefully removed.

With that card out of the way, it was easy to fold the whole flower in half and whip-stitch the sides of the orange hexagons.

I then carefully removed the cards from the orange hexagons and appliquéd the flower to the foundation fabric, I used felt.


Finally, I added a stem and leaf made of felt and stitched them down with Cretan Stitch. The very last thing to do was to place the flower inside a window card, and the birthday greeting card was done!


Thursday 24 August 2023

What's In A Quilt - The Green Man - Part: 4 Hawaiian Quilt

Last time we looked at reverse appliqué. Today I will show you a block made in a technique from Hawaii, where reverse appliqué is a must.

Hawaiian quilt patterns are unique in that they mainly feature leaves and flowers. The whole top layer is folded and cut, in the way we used to make paper snowflakes in our childhood. Also, most quilts are echo quilted.


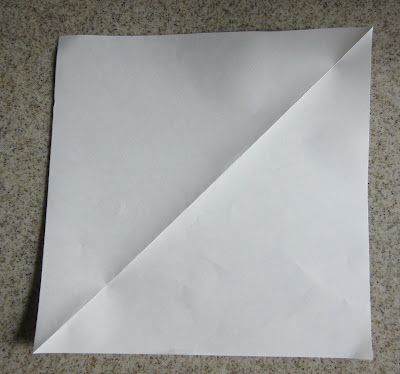
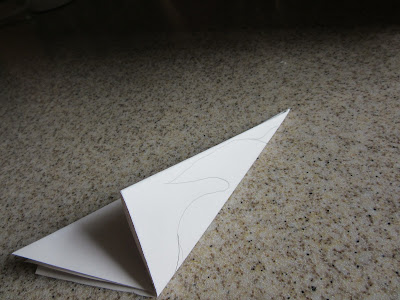
A folding tutorial for making the pattern:

As you can see I used a sheet of paper. For a real quilt, you obviously use the top fabric and fold it until you can cut it. Care and pins are needed to keep the folds of fabric stable while cutting.


Kathy Nakajima is the most famous Japanese maker of Hawaiian Quilts.

I used a print with a wooden look, for the bottom layer of my Green Man Block.
Notice that the bottom fabric is not quilted, but the top layer has dense echo quilting.


To be continued...


 Read more:

Japanese quilter Kathy Nakajima of Hawaiian Quilt fame.

Wednesday 23 August 2023

WIPW - A Finish & A Start + A Grandmother's Flower Garden Birthday Card

 It's been a busy week to report on here at Work In Progress Wednesday.


Mandala

I completed the work I started last week.


Sunday Stitch School Stitch Sampler

I added the following stitches:

#250 Danish Knot Chain Stitch (mint green), #247 Scallop Blanket Stitch (orange/yellow variegated) and #141 Feathered Zig-zag Chain Stitch (light green/yellow variegated)


Sunday Stitch School Reference Chart

I pressed on all labels and stitched them down by machine with invisible stitching (monofilament nylon). The labels are secure and won't fall off. There is no need to worry as I pull this reference chart out time and again to look for stitches.


I also prepared a new chart with slightly larger squares (6 cm x 6 cm) and added the strips of support fabric. The chart is ready to receive its first stitch, #262, on Sunday.

Birthday Card

One of my aunts will soon be 95 and I wanted to make her a cheerful and bright card. Why not use the hexagon shape and the Grandmother's Flower Garden pattern? More on the construction work in a later blogpost.


Sunday 20 August 2023

Sunday Stitch School: Preparatory Lesson - Template Making

Hi, and welcome to Sunday Stitch School.  Today we won't be learning a new stitch! Instead, we will be preparing for next week's stitch, which is a six-pointed star. 

In the past, I have made a number of hexagon templates from scratch while carefully looking at the instructions, but after a few weeks, I always seem to forget the technique. 

Therefore I wanted to record the process, as this will help me make both hexagons and stars with six tips. Once this is published on the blog, I can always go back and find the instructions whenever I need to.

.................

Things needed: 
a sheet of paper, a pencil and a compass. 
Later on, a ruler, an eraser, a circle template, a piece of template plastic, a stiletto/awl or other sharp instrument for piercing, a marker with permanent ink and a pair of scissors.

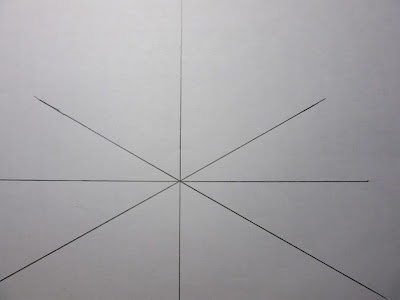
1. Draw a straight line.

2. Align the compass at 90º and make a new line.

3. You now have a straight cross.

4. Place the compass on the horizontal line.

5. Make pencil marks at 30º and 150º.

6. Align a ruler on the cross point and the 150º pencil mark and draw a line.


7. Do the same with the cross point and 30º mark.


8. Use an eraser to remove the horizontal line.

9. Place a circle template right over the middle of the cross point. Draw the circle.

10. Draw several more circles and mark the spots where the circle meets the straight lines.

11. For a permanent template, trace the dots onto a piece of template plastic.

12. Use a sharp pointed stiletto or awl and make holes in the plastic.

13. Use markers with permanent ink and fill in the triangles created between the dots.

14. Use a pencil with a fine enough tip to go through the holes in the template to mark the fabric.

15. For a hexagon, draw a continuous line from dot to dot. 

16. You need a pair of scissors to cut out the hexagon template. It is then easy to trace the shape onto scrap cards for hexagon quilt making.