I came across Chequered Chain Band in two of my books, Mary Thomas's Dictionary of Embroidery Stitches and Reader's Digest Complete Book of Embroidery.
A search online led me to Sarah's Hand Embroidery Tutorials and needle crafter.com
In all four sources, the instructions are similar, and to me, rather confusing - it IS a complex stitch. After having tried them all, I saw a pattern arise and decided to make my own photo instructions with hints in the form of a star ★.
Let's have a look:
You need to stretch the fabric in a hoop and stitch a column of Straight Stitch, with good spacing:

Then thread two needles with a loop of thread each, you need two different colours, I used green and purple:
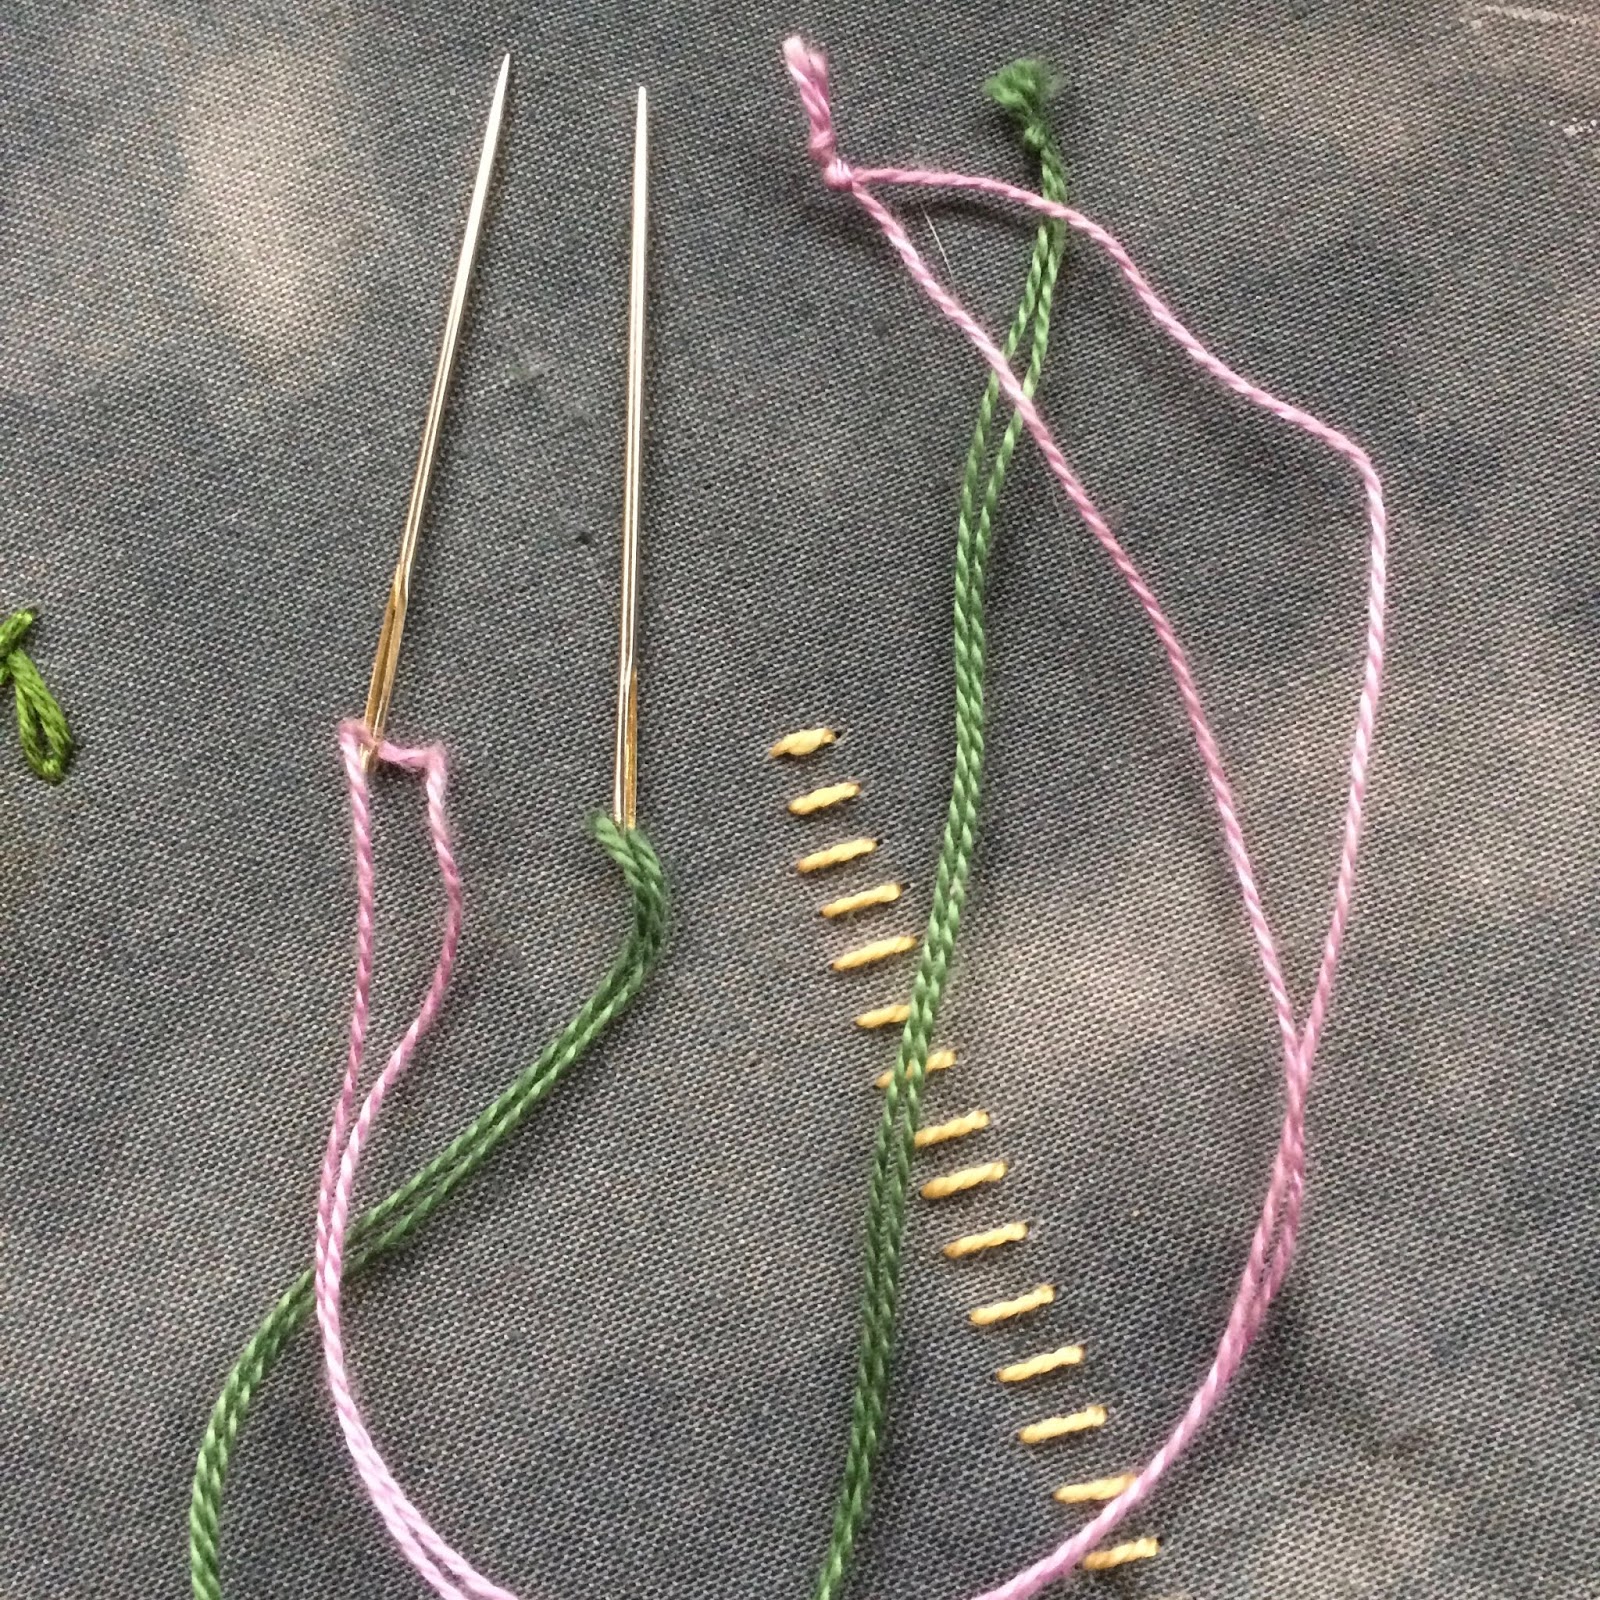
Let one thread (in my case green) out above and in the centre of the column of basic stitches.
Spred them to the left and right.

The other thread (purple) comes out below the first base stitch, make sure you spread them left and right.
In your head, number them like in the picture and note that number 3 is the star player ★.

Pull the star ★ out to the right.

Make sure the needle goes over the star ★.
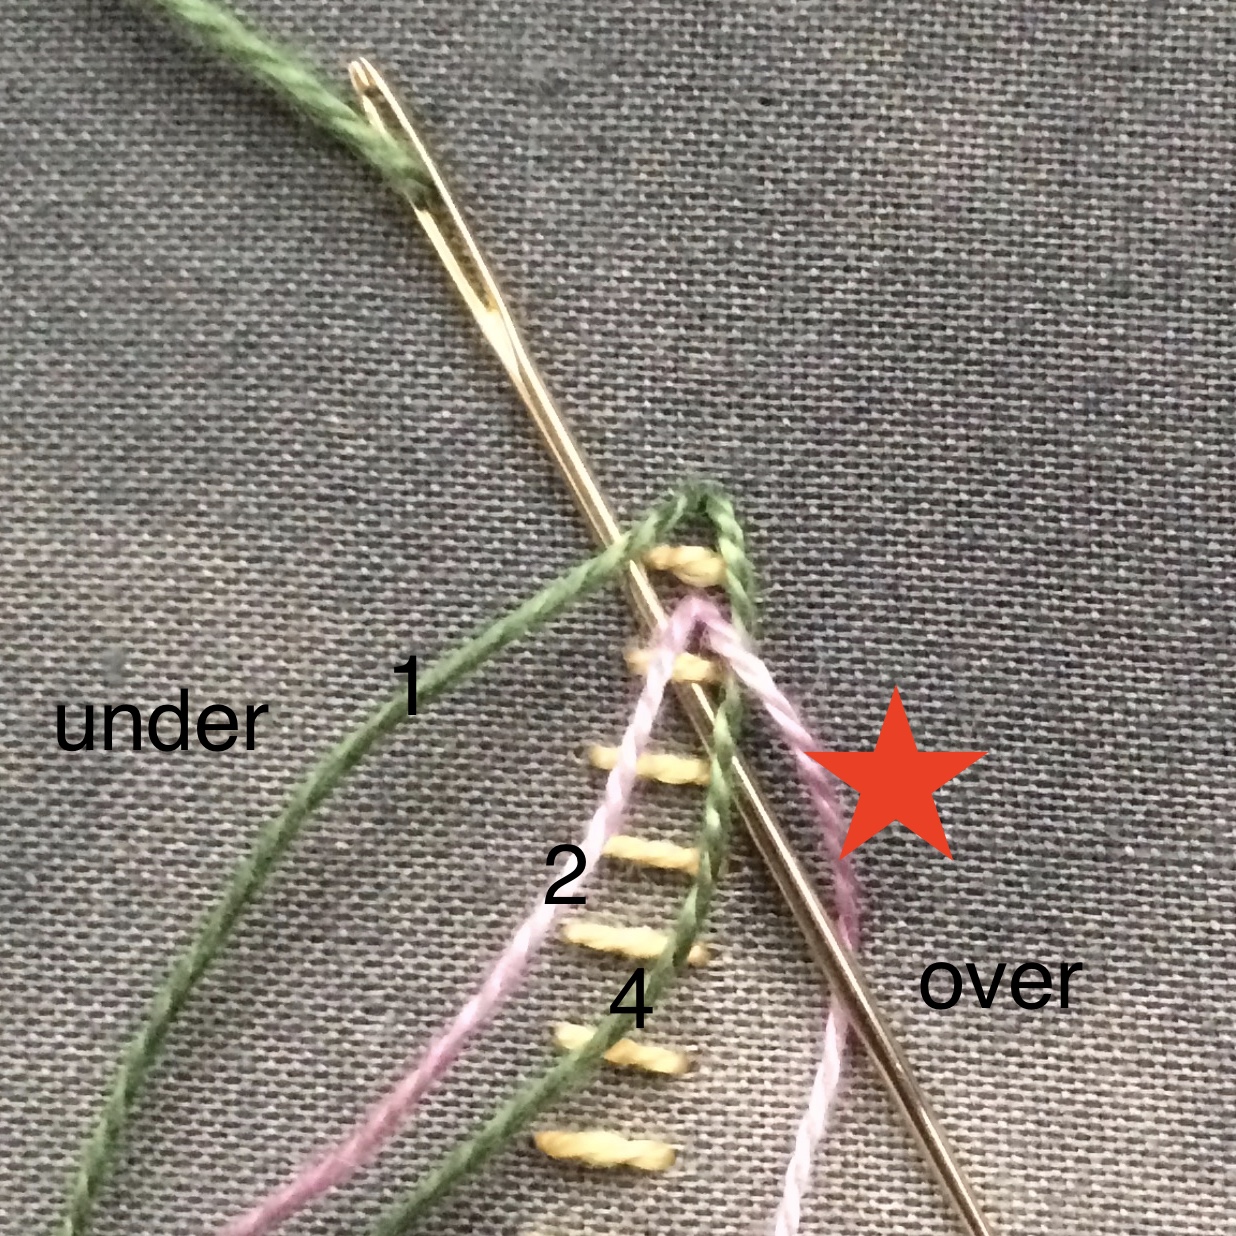
Pull the thread through, and you have your first (green) Chain Stitch.

Now the green thread on the right becomes the star ★.
Pull it out to the right.

Use the purple thread under the THIRD base stitch and the three threads on the left hand side,
while taking care to go over the star ★ on the right.

Pull, and repeat in the same way, alternating the green and purple thread.

When you have gone over the last Straight Stitch of the column, anchor the last thread to make a final (mock) Chain Stitch.

Anchor the (mock) Chain Stitch with a short stitch just below.
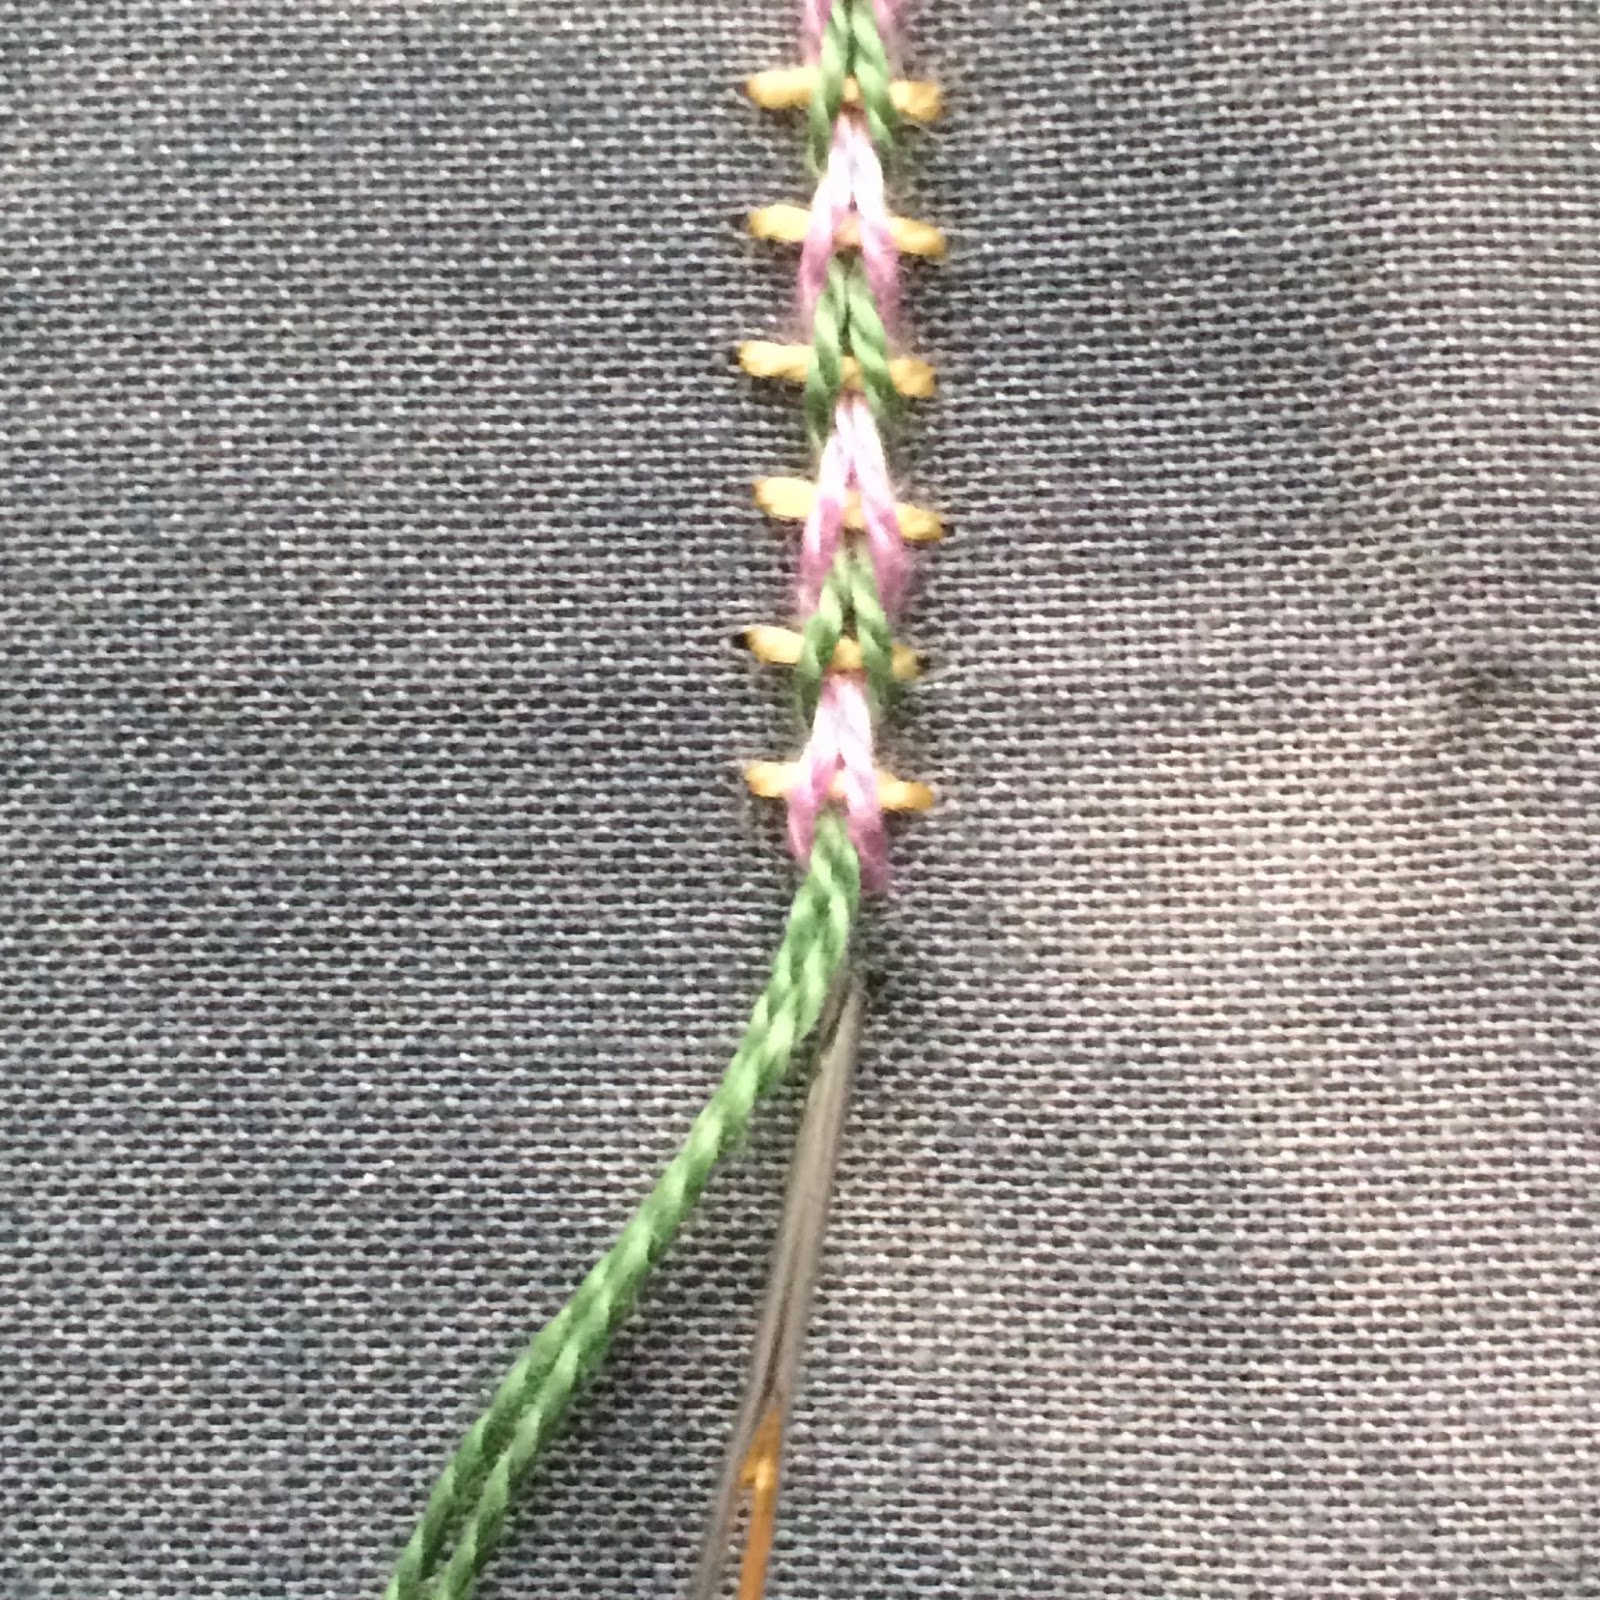

You should now have a nice Chequered Chain Bar.

Give it a try. It is tricky at first, but when you understand the alternating of the two coloured threads, and keep the star ★ to the right, it becomes very easy.
I hope you will have fun.
Updated:
I have got reports that this stitch has caused a lot of problems in the form of knots. Be sure that the needle is taken only through the pink loop (picture B), and not through the green loop as seen in picture A.


Updated:
Mattia tells me the French name is: point de chaînette deux tons en relief
Homework:

Working this on Aida will be easy, I hope.
6 comments:
Bonjour - le nom français de ce point est :
- point de chaînette deux tons en relief
Merci
Mattia
I like how this looks! (Although it does look a little complicated to stitch.) I guess I just need to try it.
Yikes! Complicated indeed! Bit it's turned out well. I suspect it is one of those that definitely needs to be worked in a hoop, to reduce the number of hands needed!
The chain band looks really pretty. I could see myself getting in knots with this one.
That's an intricate stitch!
But the results are eye catching. Congratulations Queenie on your careful work.
My goodness! Your chain bar sure looks complicated! So pretty with the different colors peeking through.
Post a Comment