
Part 7 - Millinery and Hat Making

Here is the seventh part of a tutorial for stumpwork portraits, inspired by Fay Maxwell, whose excellent book Ladies with Hatitude I warmly recommend.
MILLINERY AND HAT MAKING
There are many materials that can be used to make a hat - fabric, felt, lace, yarn, fur...


The simplest of fur hats, a small rectangle!
Let's make a hat out of a piece of felt:

Cut out a piece large enough for the brim and the crown.

Cut out the rounded crown


The brim should now stand out.


Like this? Then stitch it down.

The brim can be decorated with some stitches.

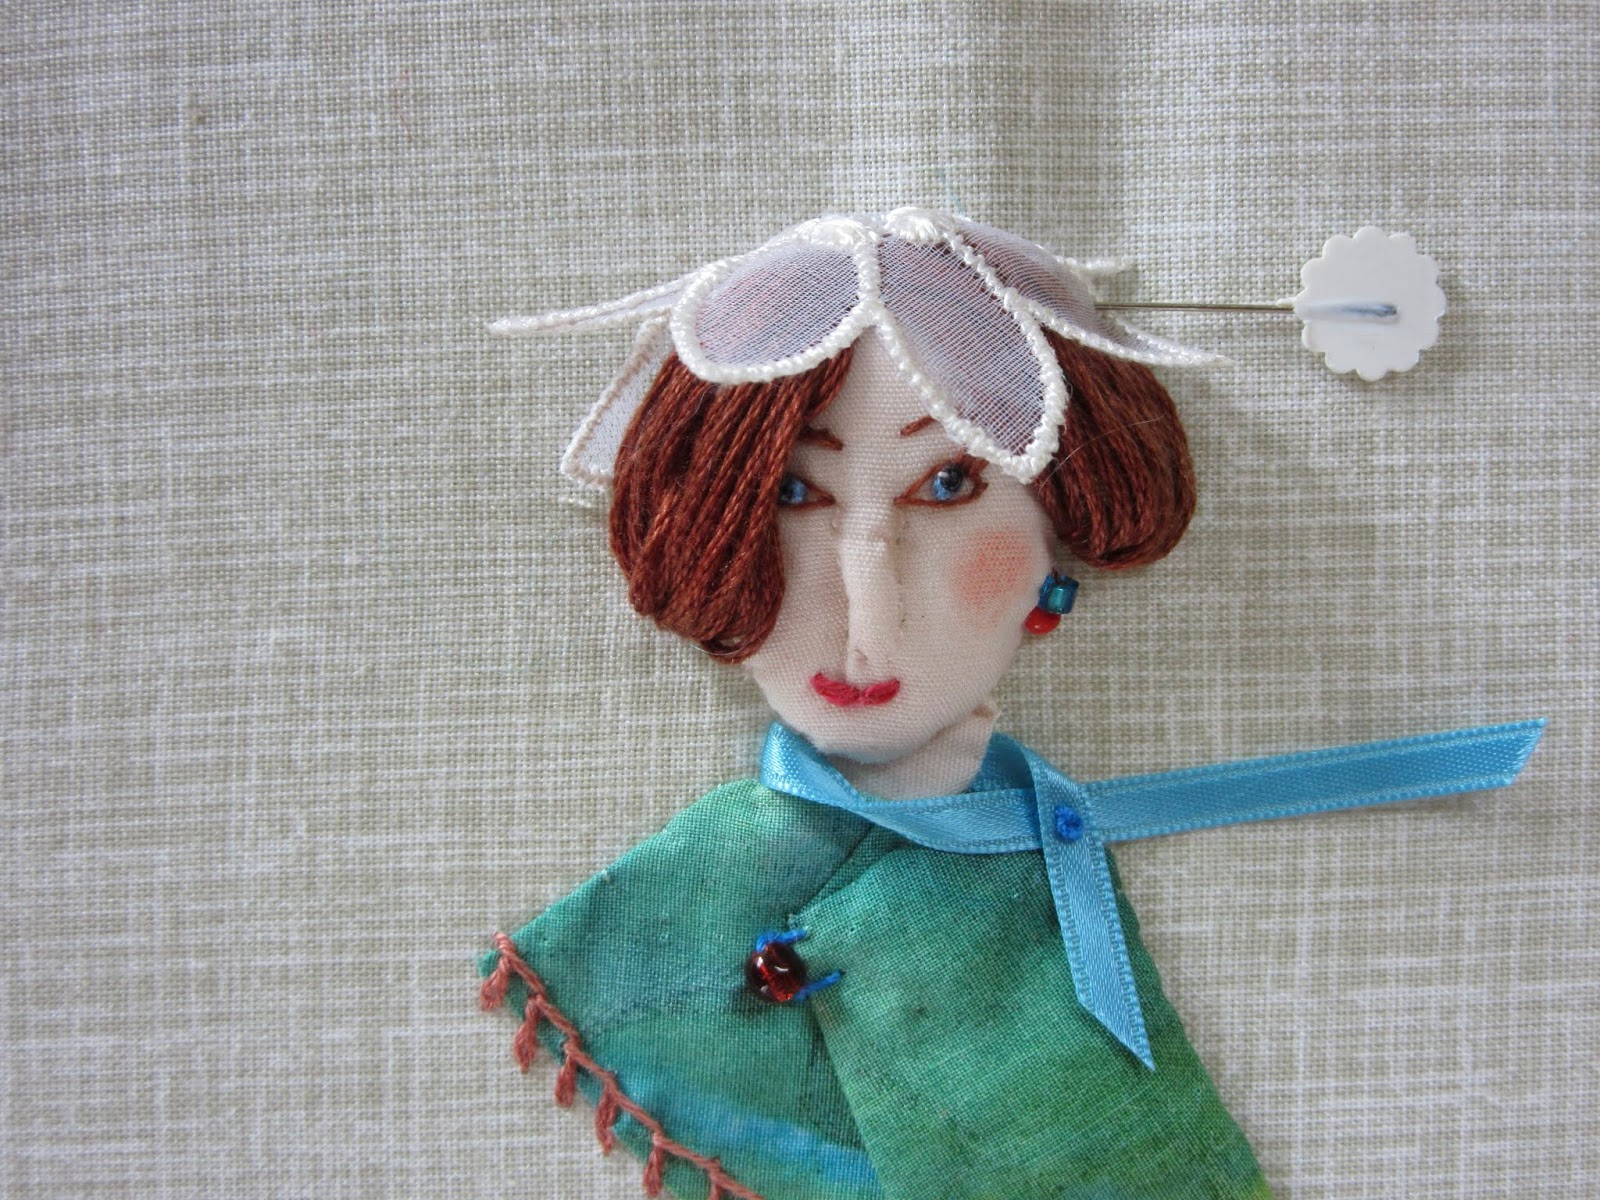
Now, let's make another hat, using the same fabric used for the coat.

Take a strip of fabric, gather it in the middle, and cut off.

Drape the gather over the top of the head.


Fix the two far edges of the brim to the background so the brim stands out.
For a simple decoration on the hat, take a piece of felt,
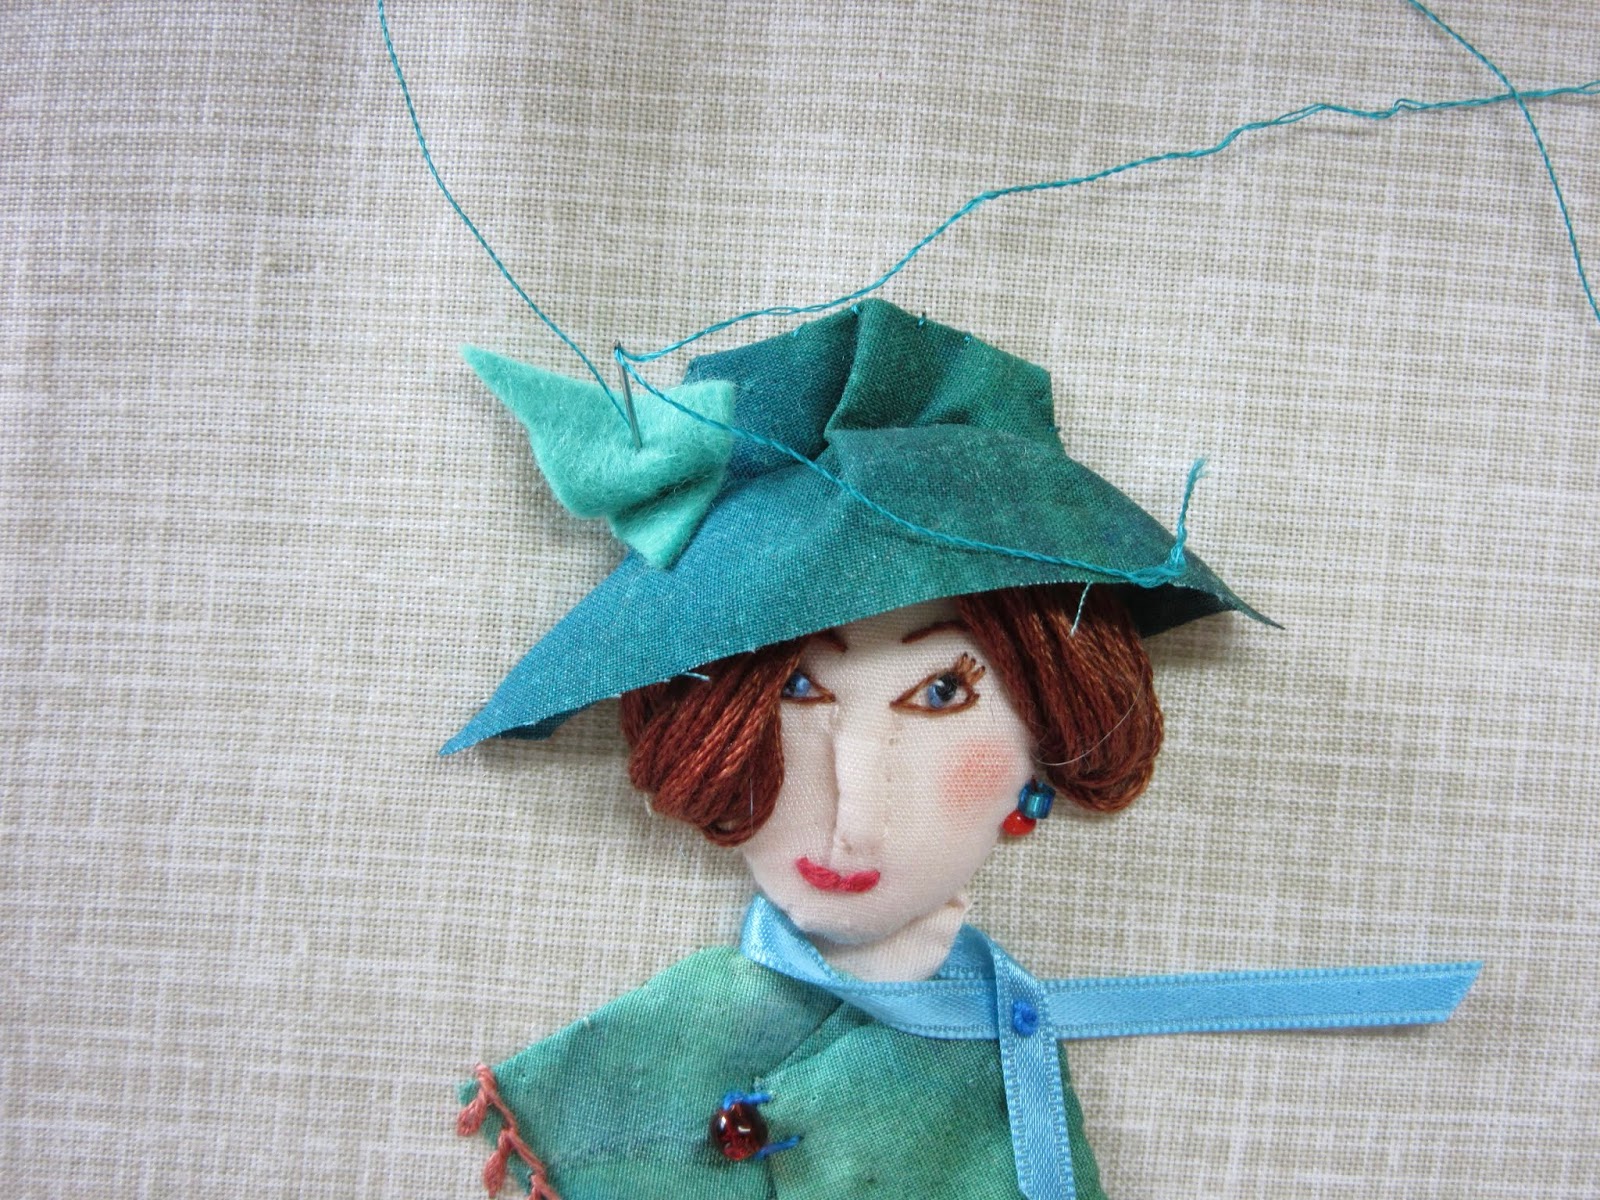

Instant glamor, even if the brim has a raw edge!
For ideas and illustrations of various hats check out this list.
I usually make my portraits into cards by stretching the fabric over a piece of cardboard. Click here to see.
Here ends the basics in Stumpwork Portrait making. In future I will post alternative ways to arrange hair, make garments and so on.
I hope you have enjoyed this tutorial and will have a go!
I hope you have enjoyed this tutorial and will have a go!
19 comments:
You can also use needlelace stitches to make hats that look like knitted beanies...!
Absolutely!
I also know someone who has made hats by knitting darning wool with a pair of bamboo skewers (for BBQ) - a job for the patient one!
In this free form of stumpwork ANYTHING goes, so I usually use up odd pieces of scrap.
It's been a great tutorial with so many examples of how bits of fabric can be manipulated. I thoroughly enjoyed these posts.
xx, Carol
Love to watch the process! Looking forwards to more tutorials.
What beautiful clever work Queenie. The hats are lovely and the portrait too.
I enjoyed your tutorials on stump work, thank you.
Great tutorial with excellent photos illustrating how to do what you explain!
Thank you for your kind words. It was fun, although time consuming, to make this tutorial.
Isn't it amazing that tweaking a scrap of fabric can turn into a hat?
Thank you for your praise and encouragement. Time permitting there will be many more tutorials.
I am glad to hear that, and hope you have been inspired to play with any odd bit of fabric you might have.
Your tutorial has been a pleasure to follow. Such a variety of millinery examples and fabrics.
The lady in No 7 photo seems to be daring you to alter her hat but in No 8 is quite pleased you did.
With this simple way of fixing the hat to the background there is no problem changing to another hat! Just rip out a few stitches and stitch on another one!
It was fun to make this tutorial and I am pleased so many have read it.
Wow!!!!!!!!!!!!!!!!! I WILL DEFINITELY TRY IT!!!!!!!!!!! Thank you SOOOOOOOOOOOOOOO much for the tutorial, my kind friend. Kisses!!!!!
I hope you do try it. It is fun to make these portraits!
Beautiful Hats! Thanks for a great tutorial. Inspirational!
Diane
Excellent tutorial, great hats!
Thank you Diane,
dressing these ladies in hats is great fun!
Thank you Linda,
I enjoyed making the tutorial and of course love making hats!
Gosh, Queenie! A great tutorial! Your ladies look beautiful, and from such tiny scraps too!
Thank you for sharing.
Hugs,
Barbara xx
Post a Comment