Sunday, 20 August 2023

Sunday Stitch School: Preparatory Lesson - Template Making

Hi, and welcome to Sunday Stitch School.  Today we won't be learning a new stitch! Instead, we will be preparing for next week's stitch, which is a six-pointed star. 

In the past, I have made a number of hexagon templates from scratch while carefully looking at the instructions, but after a few weeks, I always seem to forget the technique. 

Therefore I wanted to record the process, as this will help me make both hexagons and stars with six tips. Once this is published on the blog, I can always go back and find the instructions whenever I need to.

.................

Things needed: 
a sheet of paper, a pencil and a protractor. 
Later on, a ruler, an eraser, a circle template, a piece of template plastic, a stiletto/awl or other sharp instrument for piercing, a marker with permanent ink and a pair of scissors.

1. Draw a straight line.

2. Align the protractor at 90º and make a new line.

3. You now have a straight cross.

4. Place the protractor on the horizontal line.

5. Make pencil marks at 30º and 150º.

6. Align a ruler on the cross point and the 150º pencil mark and draw a line.


7. Do the same with the cross point and 30º mark.


8. Use an eraser to remove the horizontal line.

9. Place a circle template right over the middle of the cross point. Draw the circle.

10. Draw several more circles and mark the spots where the circle meets the straight lines.

11. For a permanent template, trace the dots onto a piece of template plastic.

12. Use a sharp pointed stiletto or awl and make holes in the plastic.

13. Use markers with permanent ink and fill in the triangles created between the dots.

14. Use a pencil with a fine enough tip to go through the holes in the template to mark the fabric.

15. For a hexagon, draw a continuous line from dot to dot. 

16. You need a pair of scissors to cut out the hexagon template. It is then easy to trace the shape onto scrap cards for hexagon quilt making.




Friday, 18 August 2023

Friday Homework for Lesson 261: Y-Edge Stitch

 It's easy and looks nice on an edge.

Sunday Stitch School Reference Chart
I had to add a piece of ribbon to work this stitch on an edge.


Aida Sampler

Y-Edge Stitch looks especially nice when worked in a variegated thread.


Mottled Wool Scribble Cloth


If you stitch on a flat surface instead of over an edge, the stitch looks almost like #236 Plaited Fly Stitch.

You can see the difference here. 


Thursday, 17 August 2023

What's in a Quilt - The Green Man - Part 3: Reverse Appliqué

For block number three, let's look at reverse appliqué. 

Appliqué usually means that we add a patch of fabric on top of the foundation fabric. 

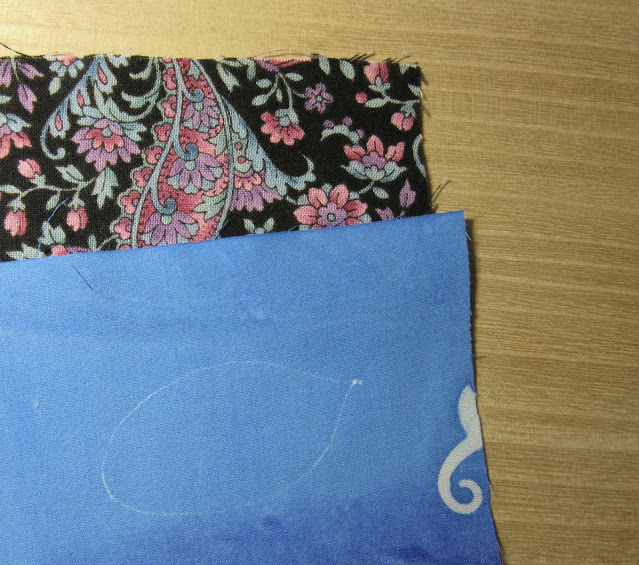
In Reversed Quilting, holes are cut out in the top fabric to reveal the foundation fabric underneath.

This technique is quite fun.

Here is a tutorial:
Layer two pieces of fabric, both right way up. Mark the cut-out design on the top piece.


Baste the two layers together outside the stitching line.


Cut out an opening in the top layer only, be sure to leave a seam allowance. Make small slits along any curved lines.

Use the needle to turn the seam allowance under the marked line. Make small stitches.


This technique is used for Hawaiian Quilting, Mola, and Stained Glass Quilting among others.

Have a look at Mola master Fumiko Nakayama here. (The website is in Japanese with computerised translation into (funny) English. 

Updated: If the website is in Japanese and you can see the mark indicated by the red circle in the browser bar, click it and select the language you wish the page to be translated into.


My Green Man was made from two sheets of prints in green.

(The two pupils are appliquéd in the usual way.)


If you are interested in reading more about The Green Men found in Norfolk churches, check out this website.

To be continued...


Wednesday, 16 August 2023

WIPW - Sunday Stitch School Reference Chart

I had to add another job to my Work In Progress Wednesday report this week. The job of typing, printing, pressing interfacing, cutting...  Here is what I have been working on:


Sunday Stitch School Reference Chart

As you can see from this picture,


I have filled in the last square, in the lower right corner, on the Sunday Stitch School Reference Chart with stitch #261 Y-Edge Stitch. As always I want to add the name of each stitch to the chart.

Therefore I have typed up a list of the numbers and names and printed it out on fabric.


To make it easier to put the chart in a hoop before embroidering the stitches that are along the outer edges, I added strips of fabric along the edges. Now had come the time to remove these butterfly-patterned strips.


The next step was to add a sheet of iron-on interfacing on the back of the typed names and cut out each individual name.

What remains to be done is to press these labels onto each matching square and then secure them with machine stitching. That, however, is for next week.


Mandala

I have a length of wine-red metallic thread and made some rays for the small circle.


Sunday Stitch School Stitch Sampler

Two stitches were added: #33 Chinese Knot Stitch (purple, turquoise and ochre wool) and #72 Sham Hem Stitch (green and purple).