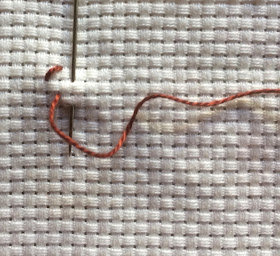
We are today looking at one of the most common Needlepoint stitches, the Tent Stitch. It can be found in many stitch dictionaries, but I have referred to 'Elizabethan Stitches, A Guide to Historic English Needlework' by Jacqui Carey.
The Tent Stitch dates back to before the 16th century, and there are many surviving examples.
One important factor with most Elizabethan embroidery is the economy of thread on the back of the fabric.
Tent stitch is an exception, it uses more thread on the back than the front of the fabric, BUT there are several ways to work the stitch, some use more and some less thread. The variations also come with different names.
Traditionally the Tent Stitch was worked diagonally and is then also known as Needlepoint Stitch, Petit Point, Canvas Stitch, Perlen Stitch, Cushion Stitch and Basketweave Stitch.
The latter because of the basketweave pattern it makes on the back of the fabric.
Here is the traditional Tent Stitch worked diagonally:
...........
When worked in horizontal rows, it is known as Continental Stitch or Half Stitch, and uses less thread, but the thread can wrap itself too tightly around the weave, making 'holes' in the weave, so do pay attention not to pull the thread too tightly.


When you come to the end of the line you can either,

stitch from down to up, or

turn the work around and, stitch like before, then
turn again when you reach the end of the row.....
The top row of yellow stitches are Half Stitch, and leave a lot of white fabric to be seen.
The rows below show the basketweave pattern, and you can see how much more the fabric is covered.
When Needlepoint is used for a seat of a chair, the Tent Stitch with basketweave back would make a much stronger surface, suitable for the wear and tear of 'upholstery' stitching.
Homework:
Fill in a square on the fake canvas with Tent Stitch (stitched diagonally).


You also have to be a little careful about the tension with half cross stitch especially if you are doing it over two threads. Too tight, and you can pull the fabric threads too tightly together, creating an openwork effect when you don't want one.
ReplyDeleteIl y a aussi en français beaucoup de noms pour ce point,
ReplyDeleteselon qu'à l'arrière il est droit ou en diagonale.
D'après Thérèse de Dillmont il s'appelle point Gobelin
Sinon, j'ai trouvé aussi petit point, point continental point de Saint-Cyr
Voilà
Mattia
Thank you Mattia:
DeleteThere are also many names in French for this point,
according to the back is straight or diagonally.
According to Thérèse de Dillmont, his name is Gobelin
Otherwise, I also found small point, point continental point of Saint-Cyr
Now is the time to tackle another needlepoint stitch. thanks for the stitch information too.
ReplyDeleteIt was nice to add another stitch on the fake canvas sampler.
DeleteThanks for explaining the different methods. I only knew the half cross stitch or petit point way of stitching.
ReplyDeleteJacqui Carey's book is full of information and I will do some more research. Mattia pointed out that there is the Goblin Stitch as well....
DeleteWhat a lot of names for one stitch!
ReplyDeleteYes, and then Mattia pointed out another name for a 'half-cross' stitch, Goblin stitch, or Gobelin Stitch. I will have to do some more research to see the difference!
DeleteI used to do a lot of needlepoint and the half cross stitch was what I used the most.
ReplyDeleteIt is a very popular type of embroidery and there are LOTS of kits.
DeleteInteresting post Queenie. what a lot of names for the stitch and ways to use it. I like the basket-weave effect and the sample of diagonal Tent stitch is really nice.
ReplyDeleteI first thought the diagonal way would be difficult, but it is easy, anyway when you stitch in only one colour! Also it gives much more compact feel, perfect for sturdy things like bags or upholstery etc.
DeleteNice tutorial Queenie.
ReplyDeleteAnd the history lesson. I can see why the basket weave would
be a good choice if it was for upholstery, more substantial, yes.
Thanks for sharing.
It gives a lot of strength to the fabric.
Delete