Pages

Wednesday, 30 November 2016

WIPW - (Pepper)Mint

It is Wednesday and time for the weekly WIPW report.

Trinity Green
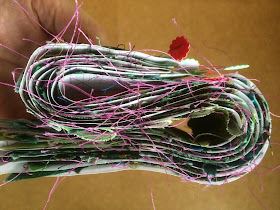
I had to spend a lot of time dealing with my computer and Blogger trouble, so I added only 189 new triangles to the paper strips.


Nevertheless I am nearing my goal as I now have 6.912 triangles in total. I will have to start laying them out on a flat surface to see if I have enough or need to add more.

Fabric in Focus
Here is a hint of (pepper)mint.


Saturday, 26 November 2016

Sunday Stitch School - Lesson 4: Danish Knot Stitch

Welcome to Stitch School.
Today I have selected a knotted stitch with a controversial name. In some of my books it is called Danish Knot Stitch and in others its name is German Knot Stitch. Somewhere on the internet it was described as a detached form of  Palestrina Stitch.
The Swedish name is Tysk Knut.
(Updated info): The French name is Point de Noel Allemand.

I have referred to these three books:
The small book in the middle is Totsuka Embroidery Stitch Book 6, and has 71! variations on this stitch, so I guess I will have other lessons based on the Danish Knot Stitch!

I have no idea where the stitch originates from. If you know, and know what it is called in your language, please leave a comment.


It is worked like this:

 Come out under the straight stitch.
 Don't go through the fabric.


Anchor it near where the first stitch came out.

This is what it looks like on Aida.


Homework
To make a Christmas card including the danish Knot Stitch.

Friday Homework for Lesson 3: Cross Stitch

Sorry for the delay.

There has been a lot to learn since last week's lesson. I have worked hard at the set homework.
Let's start with the monogram on the tea towel.

I stitched it with a piece of waste canvas, which helped to keep the stitches even.

After stitching, I sprayed the canvas with water, waited until the starched threads had softened and picked them out with a pair of tweezers.

 I am quite pleased with the result.

By paying attention I managed to make the back rather even, too. Most stitches are vertical and the crosses or horizontally drawn threads are few.

I am the student of this course, but in a way also the teacher, so I will give myself 'Well Done' for this part of the homework.

The free pattern
The object with this homework was to make the thread lie flat on the cross and the back look neat. 
I added another target, to make individual stitches without the thread traveling on the back.

The first thing I did was to separate the two threads by pulling them out one by one from the six strands of floss. This is also known as 'stripping'.

Since then I have been given the advice by Carorose to dampen the strands with a sponge before threading the needle. I have yet to try this, but Carorose is a highly professional needlewoman and have made more Cross Stitch work than anyone I know.
I paid attention to  check that the two threads were parallel even in the first part of the cross.
I did this with a tip I once got from a Japanese embroidery book - roll the needle between the thumb and index finger to untangle the threads. I blogged about this back in 2013.
I think this method works rather well.

Next let's focus on individual Cross Stitches without the thread traveling on the back.
On the internet I found something called the Pinhead Stitch.
Begin by anchoring the stitch like this:


Then make the Cross Stitch itself.

Finally anchor the stitch under the Cross Stitch.


Snip off the thread ends on the back.

The completed piece.

So how does it look on the back?

Well, certainly better than my previous work!


I think the Cross Stitch is one stitch I no longer need to get crossed with!


Work In Progress Wednesday - Delayed

I have been delayed in posting my Work In Progress Wednesday report because of computer problems, and issues with Blogger. Now I am beginning to catch up on my work.

Trinity Green
There was only time to make 135 new triangles. In total I now have 6.723 triangles.


 Fabric in Focus
These pieces are recycled from a beautiful tea towel calendar from a couple of years ago. The dates are no longer of use, and I have plenty of other tea towels for drying dishes, so this was a good way of adding another fond memory to Trinity Green.
I like the corse weave of linen among the cotton triangles.